IBM AS/400 - Configuration TCP/IP
Introduction
The IBM AS / 400 supports numerous communications interfaces (Twinax, Ethernet, Token Ring, etc.) allowing it to exchange data with other machines on the same network, or to access the Internet. To be able to use these interfaces, the corresponding service must be activated and properly configured. In this article, we will see how to enable and configure the TCP / IP service to access the local network through Ethernet.
Initialisation
To make this setting, you can start your AS/400 with a classic IPL A or B (see more information here). Once the machine is started, the login screen is displayed like this:
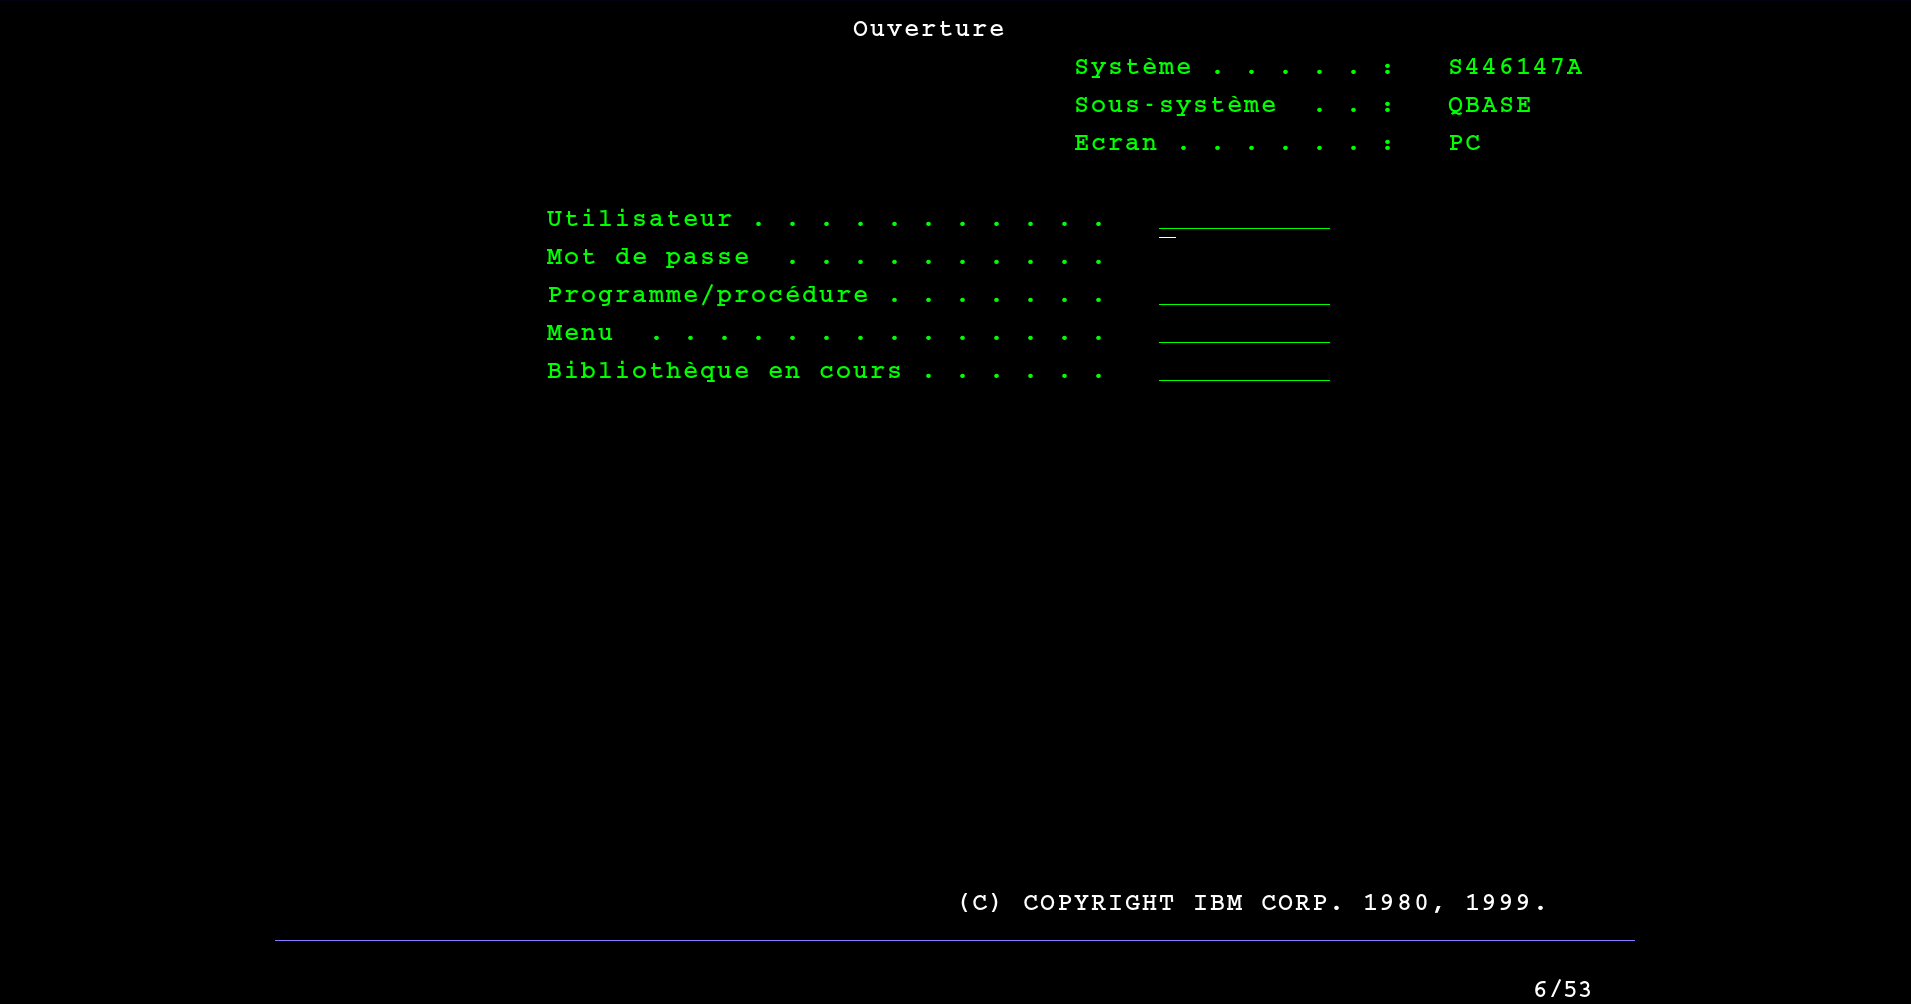
Log in as administrator with the QSECOFR account.
Access to the Communications menu
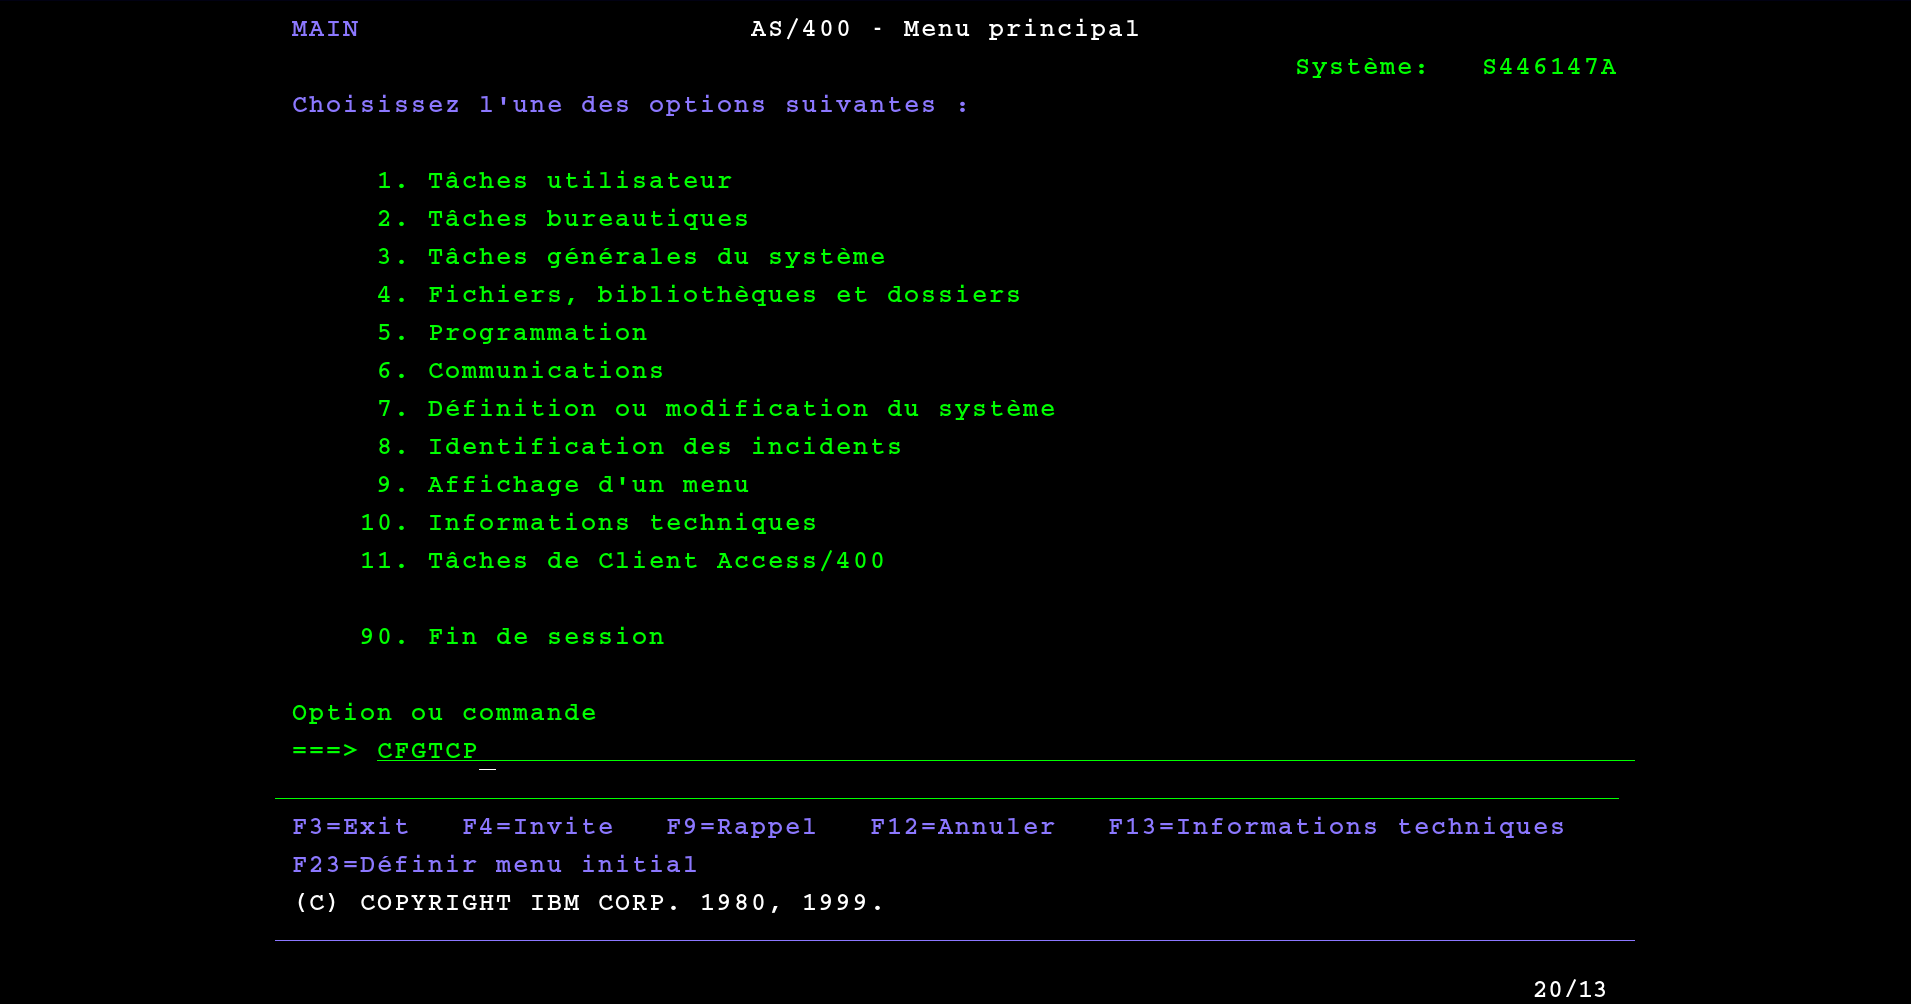
Once logged in as QSECOFR, we need to access menu 6. Communications. To do this, type 6 on the keyboard, or the command CFGTCP to access this menu:
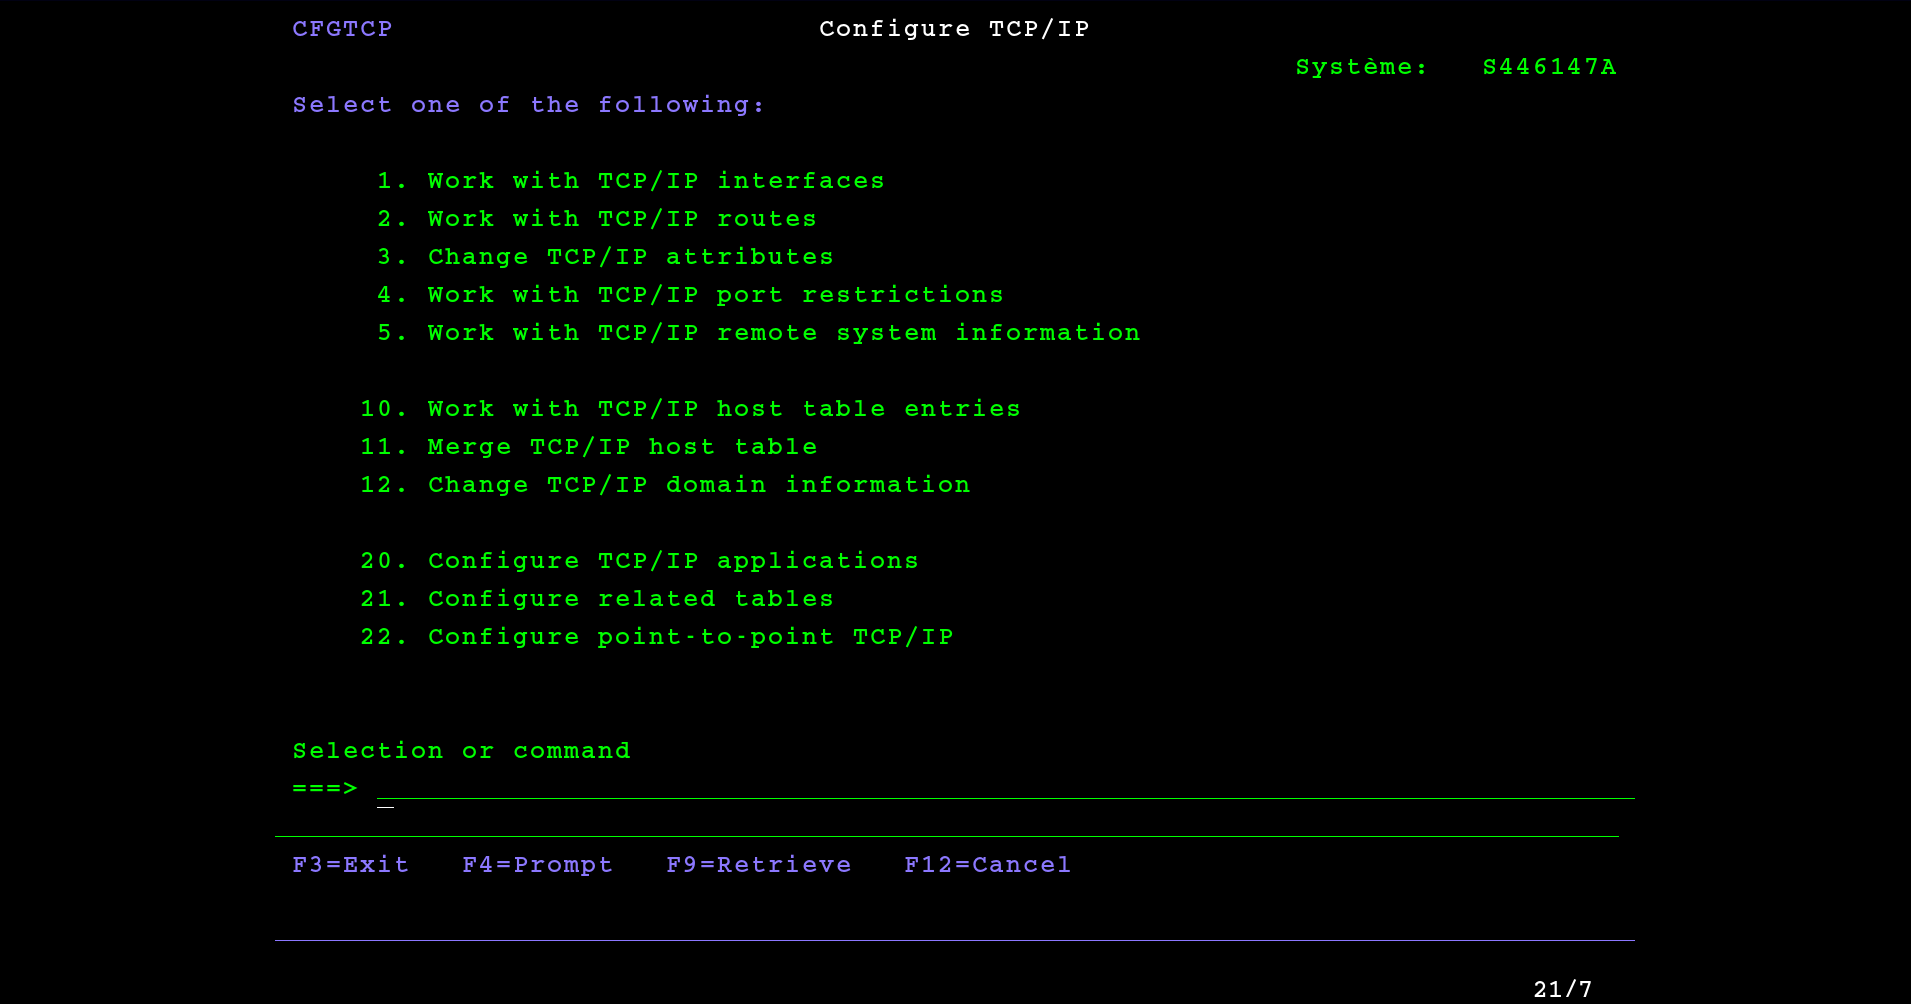
We are now in the Communications menu:
Interface configuration
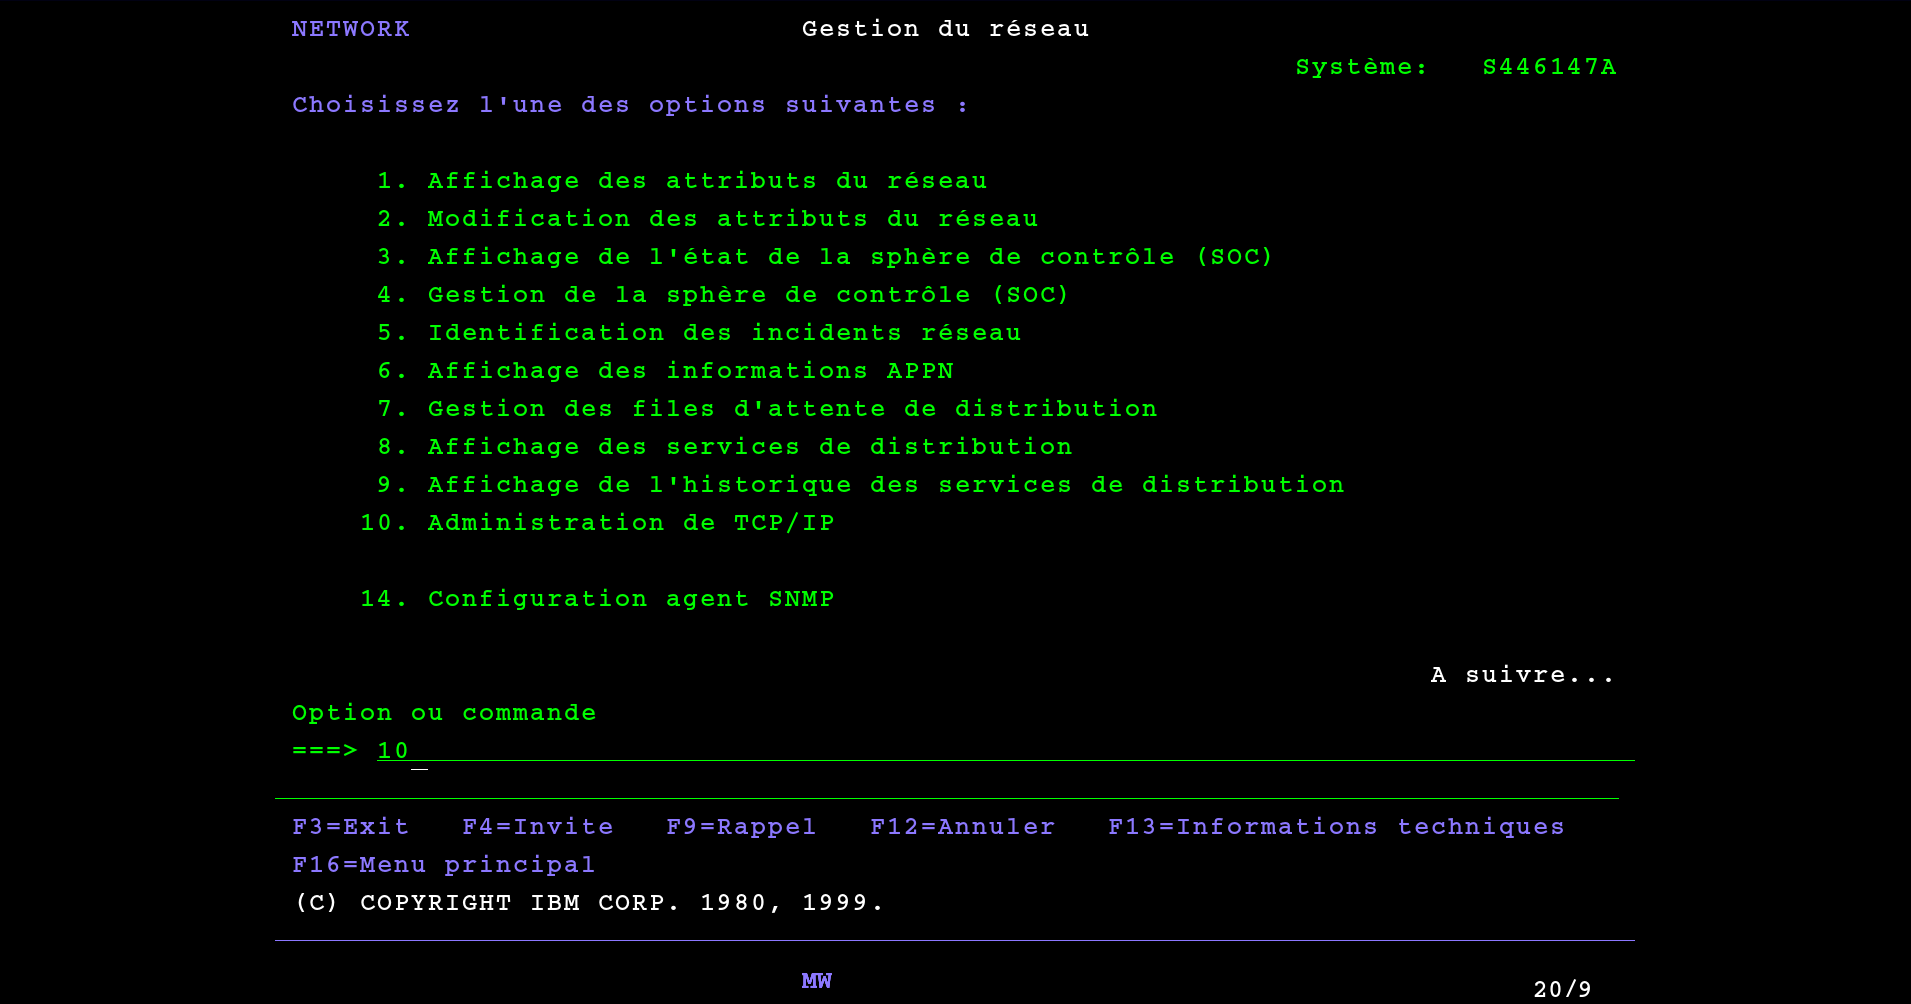
To configure the TCP / IP interfaces, type 5 from the Communications menu to get to the menu 5. Network management:
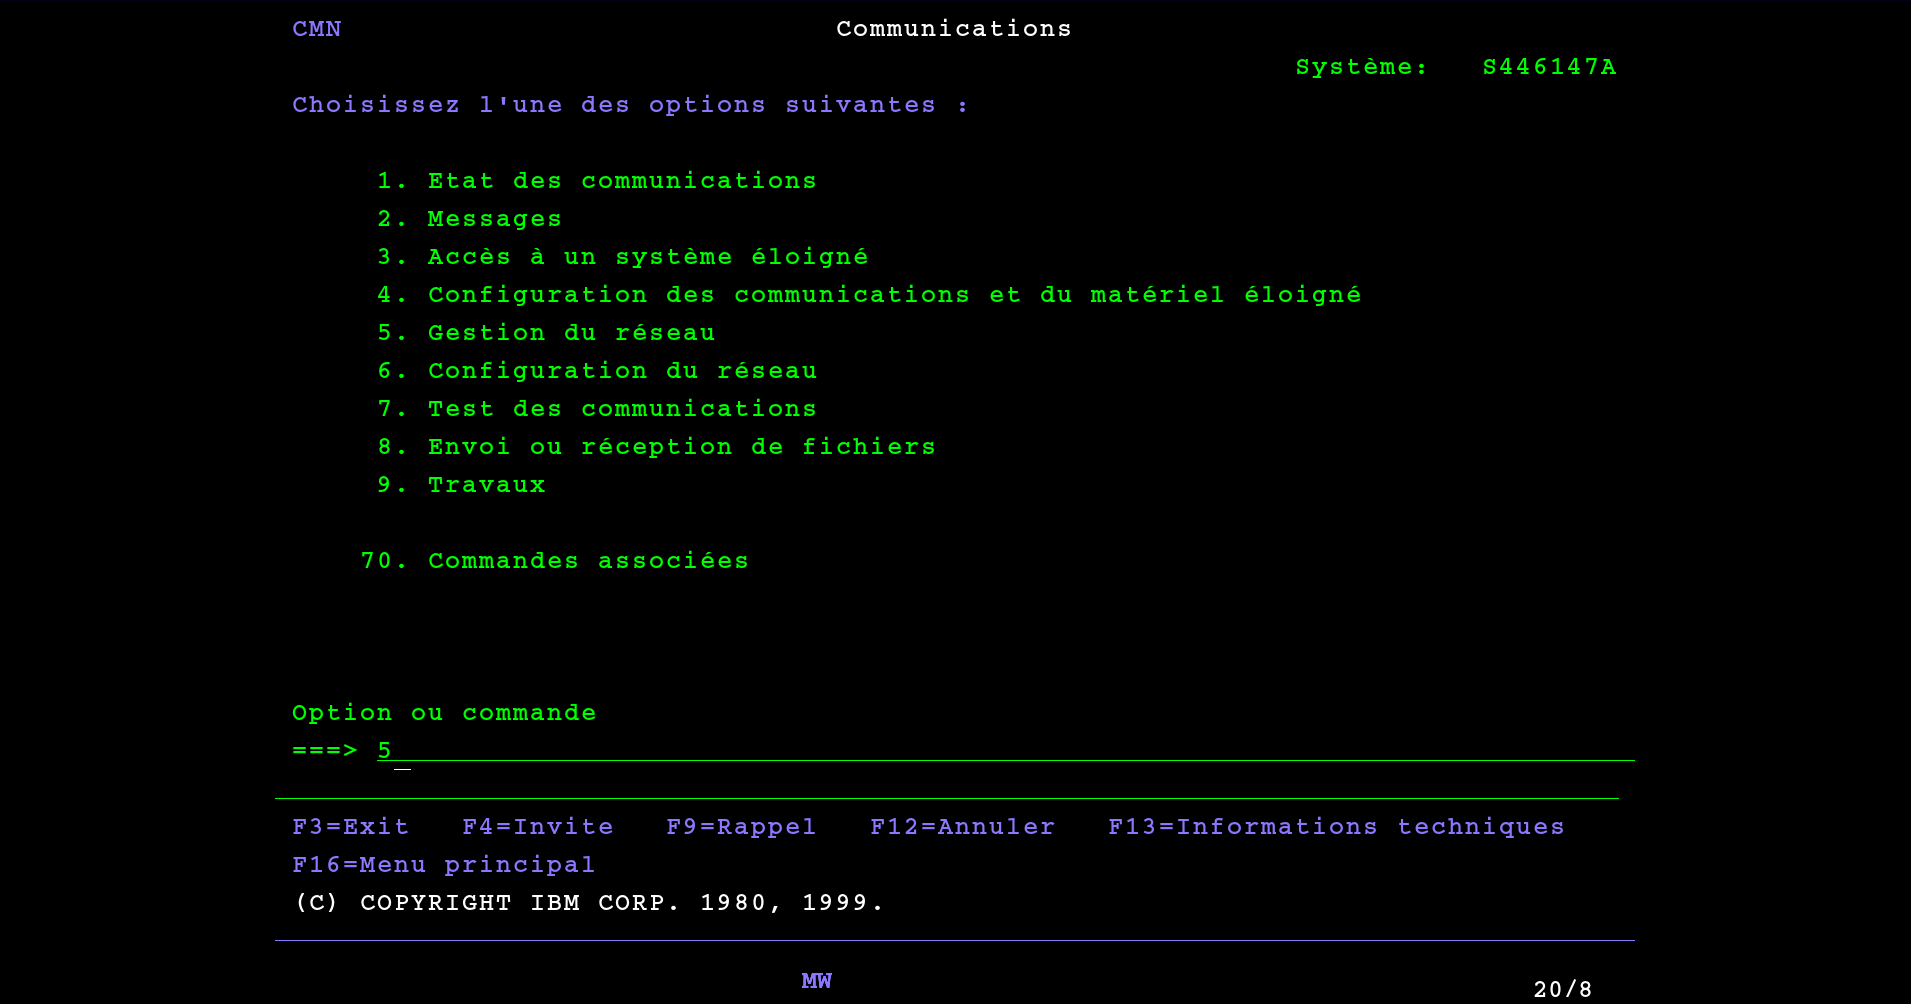
Then access the sub menu 10. TCP/IP administration :
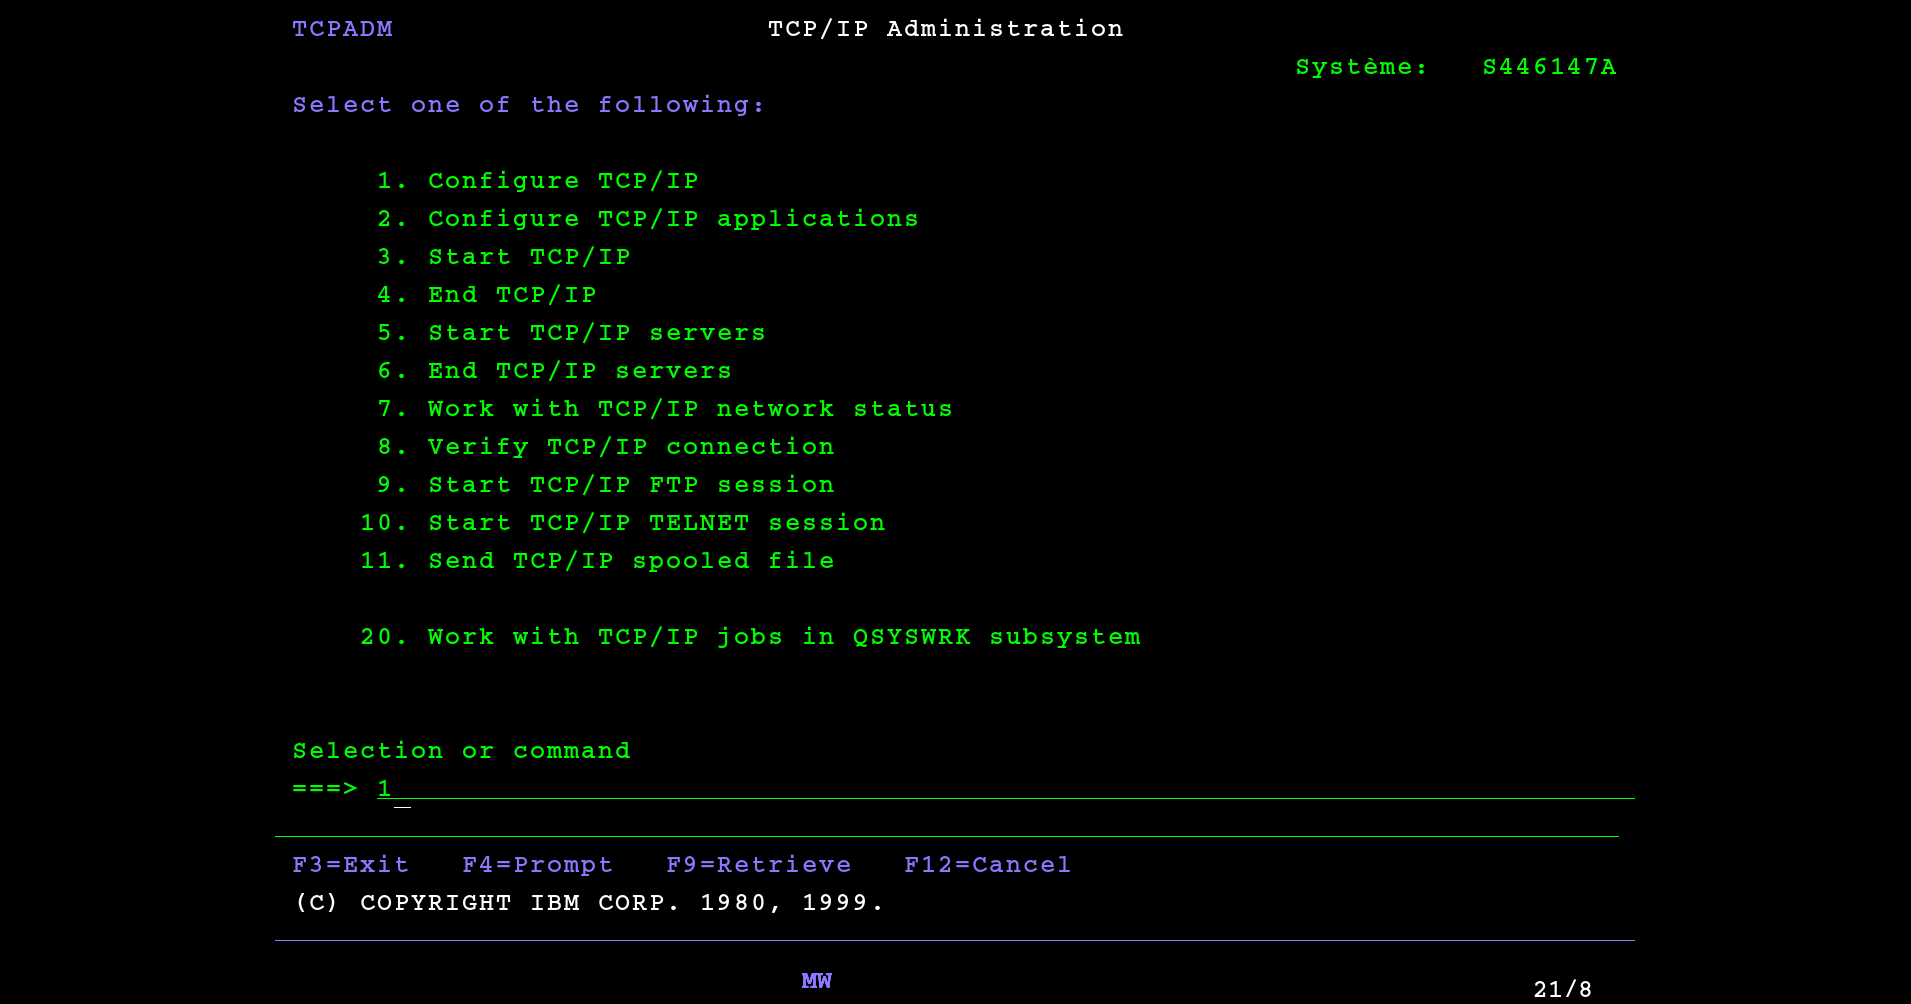
In the sub menu 10. TCP/IP administration choose 1. Configure TCP/IP :
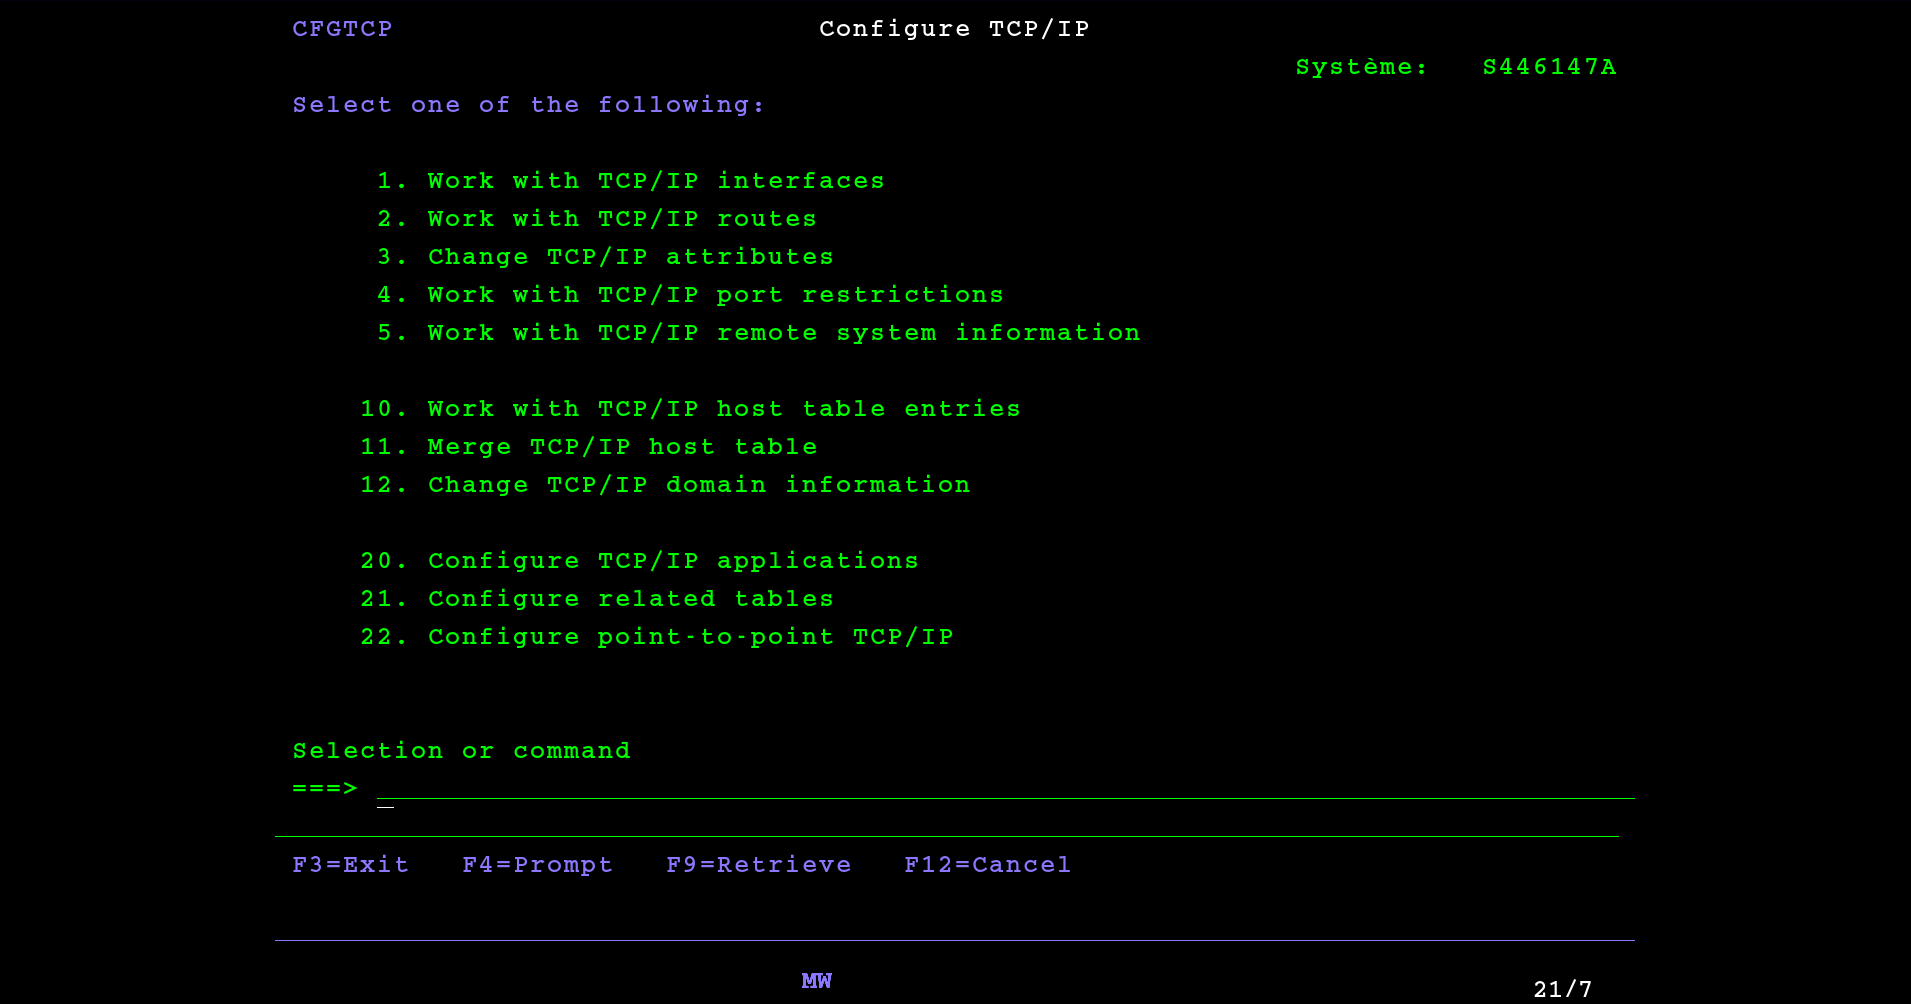
1. Work with TCP/IP interfaces
And we arrive on the menu page allowing to configure the different TCP / IP interfaces:
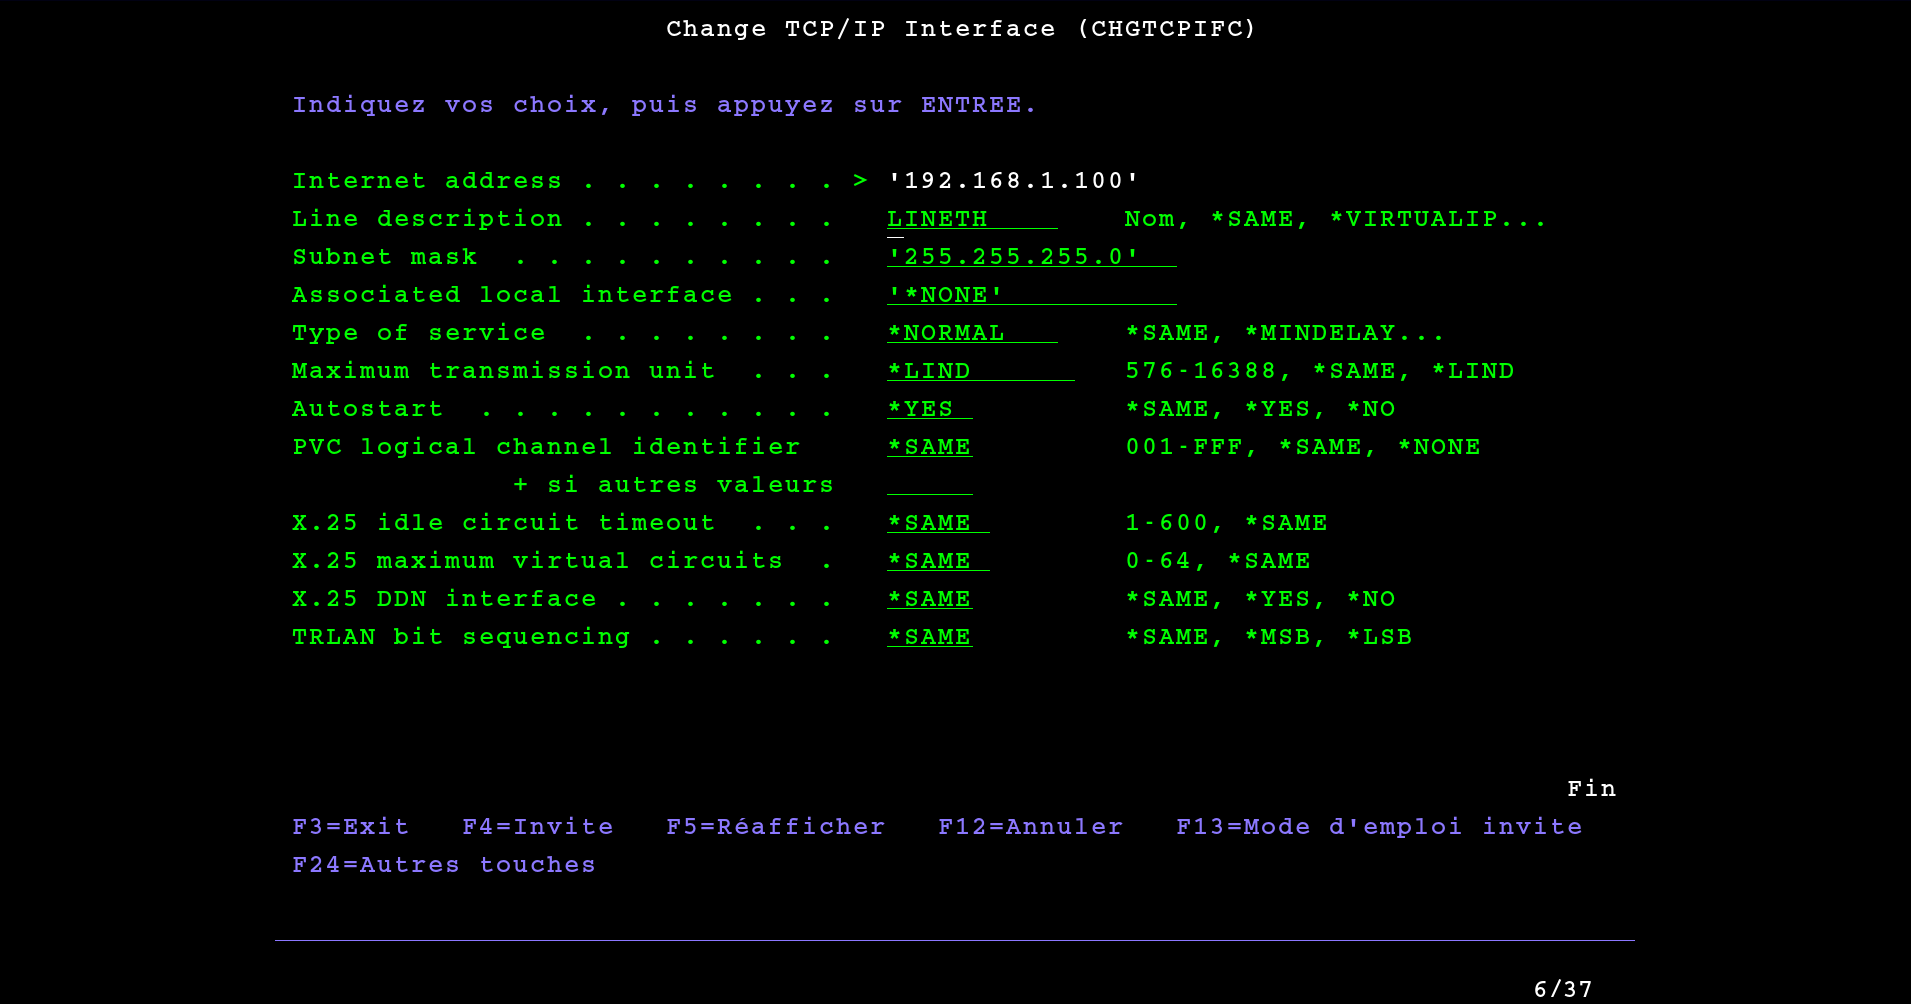
In this menu we can configure all the options of the interface.
| Option | Description |
|---|---|
Internet address |
Specifies an internet address that the local system responds to on this interface. The internet address may be an IPv4 or IPv6 address. An interface is associated with a line description. |
Line description |
Specifies the name of the line description associated with the new interface. The line description must exist before the TCP/IP interface can be added. |
Subnet mask |
Specifies the subnet mask, which is a bit mask that defines the part of the network where this IPv4 interface attaches. The mask is a 32-bit combination that is logically ANDed with the IPv4 internet address to determine a particular subnetwork. The bits of the mask set to the value one (1) determine the network and subnetwork portions of the address. The bits set to the value zero (0) determine the host portion of the address. |
Associated local interface |
Use this parameter to associate the IPv4 interface being added with an existing local IPv4 TCP/IP interface. This parameter is ignored if INTNETADR specifies an IPv6 address, *IP4DHCP, or *IP6SAC. The associated local interface (LCLIFC) is used to allow ‘transparent subnetting’ (also known as ‘Proxy Arp’) between the associated interfaces, to define unnumbered networks, or for load balancing. |
Type of service |
|
Maximum transmission unit |
Specifies the maximum size (in bytes) of IP datagrams that can be transmitted through this interface. A datagram is a basic unit of information passed over an internet network. For an IPv4 interface, the minimum MTU value is 576 bytes. For an IPv6 interface, the minimum MTU value is 1280 bytes. |
Autostart |
Specifies whether the interface is automatically started when the TCP/IP stack is activated by the Start TCP/IP (STRTCP) command. |
Now that the interfaces are configured, we need to start the TCP/IP service and then activate the interfaces.
Starting the TCP service
To start the TCP / IP service from the console, just type the command STRTCP like this :
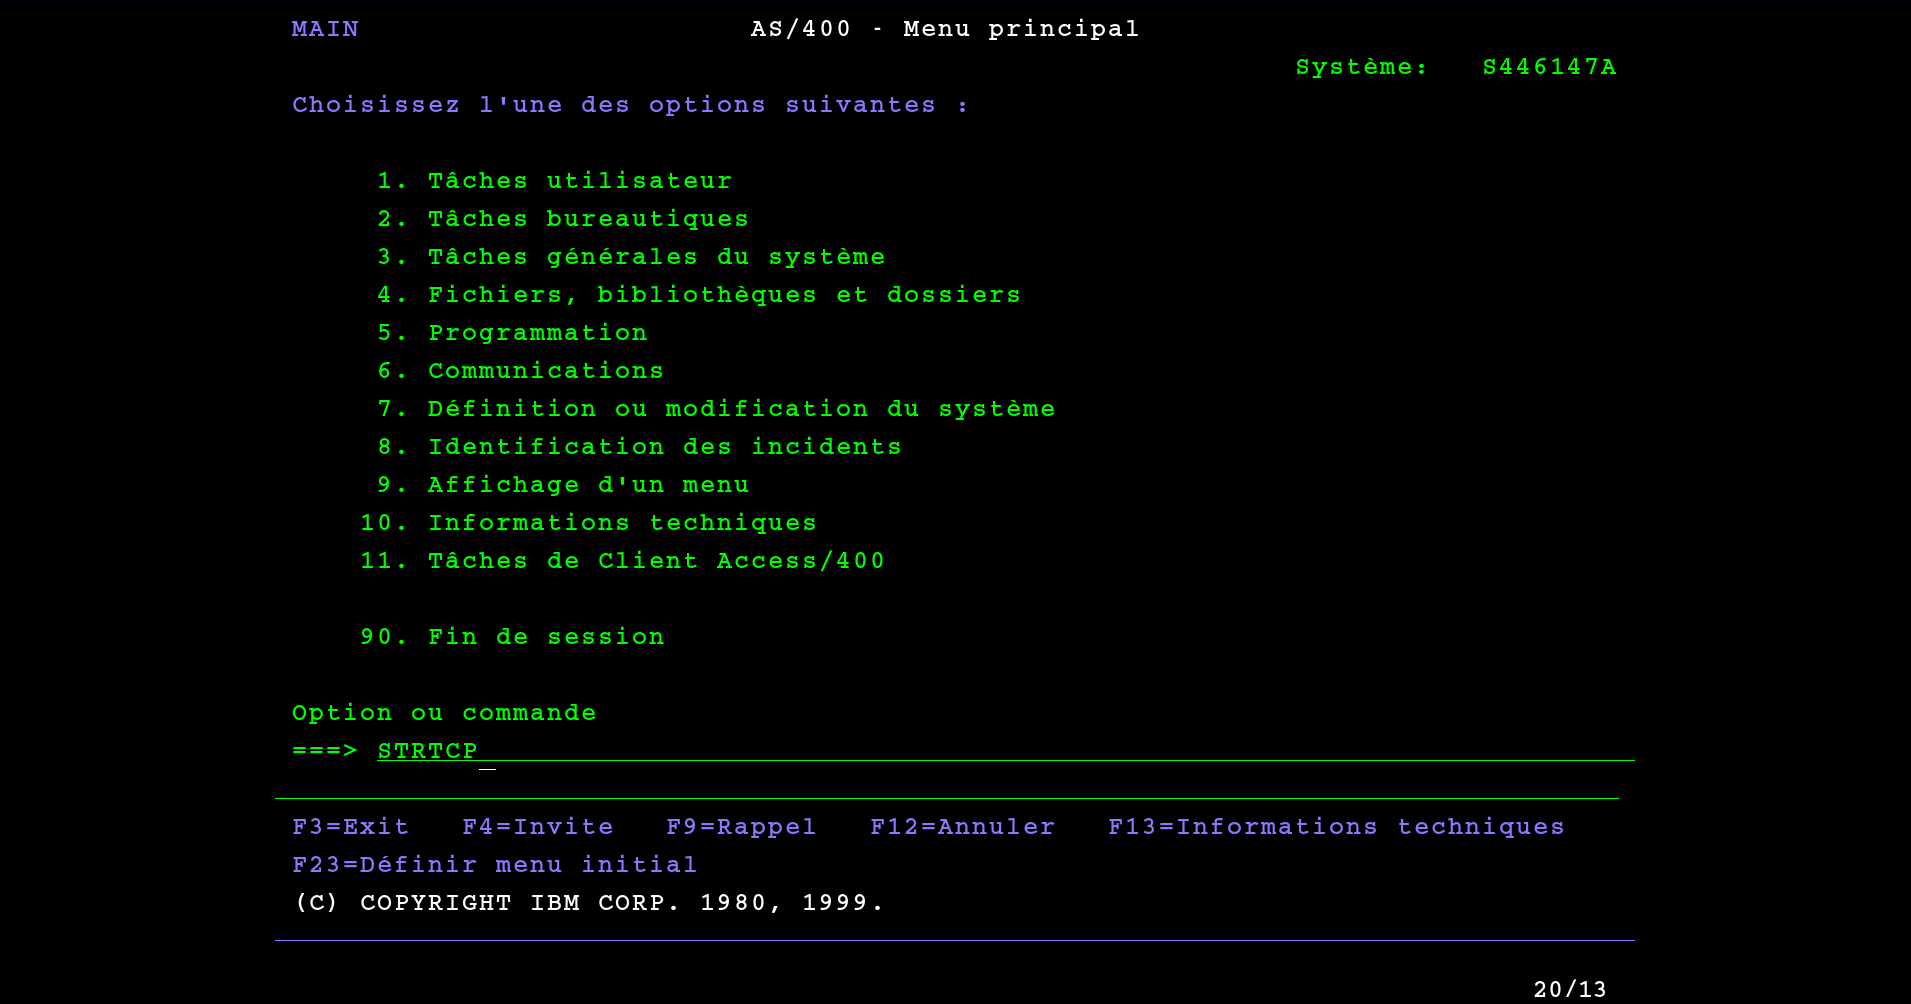
Once the service is started, we can activate the interfaces.
Activation of interfaces
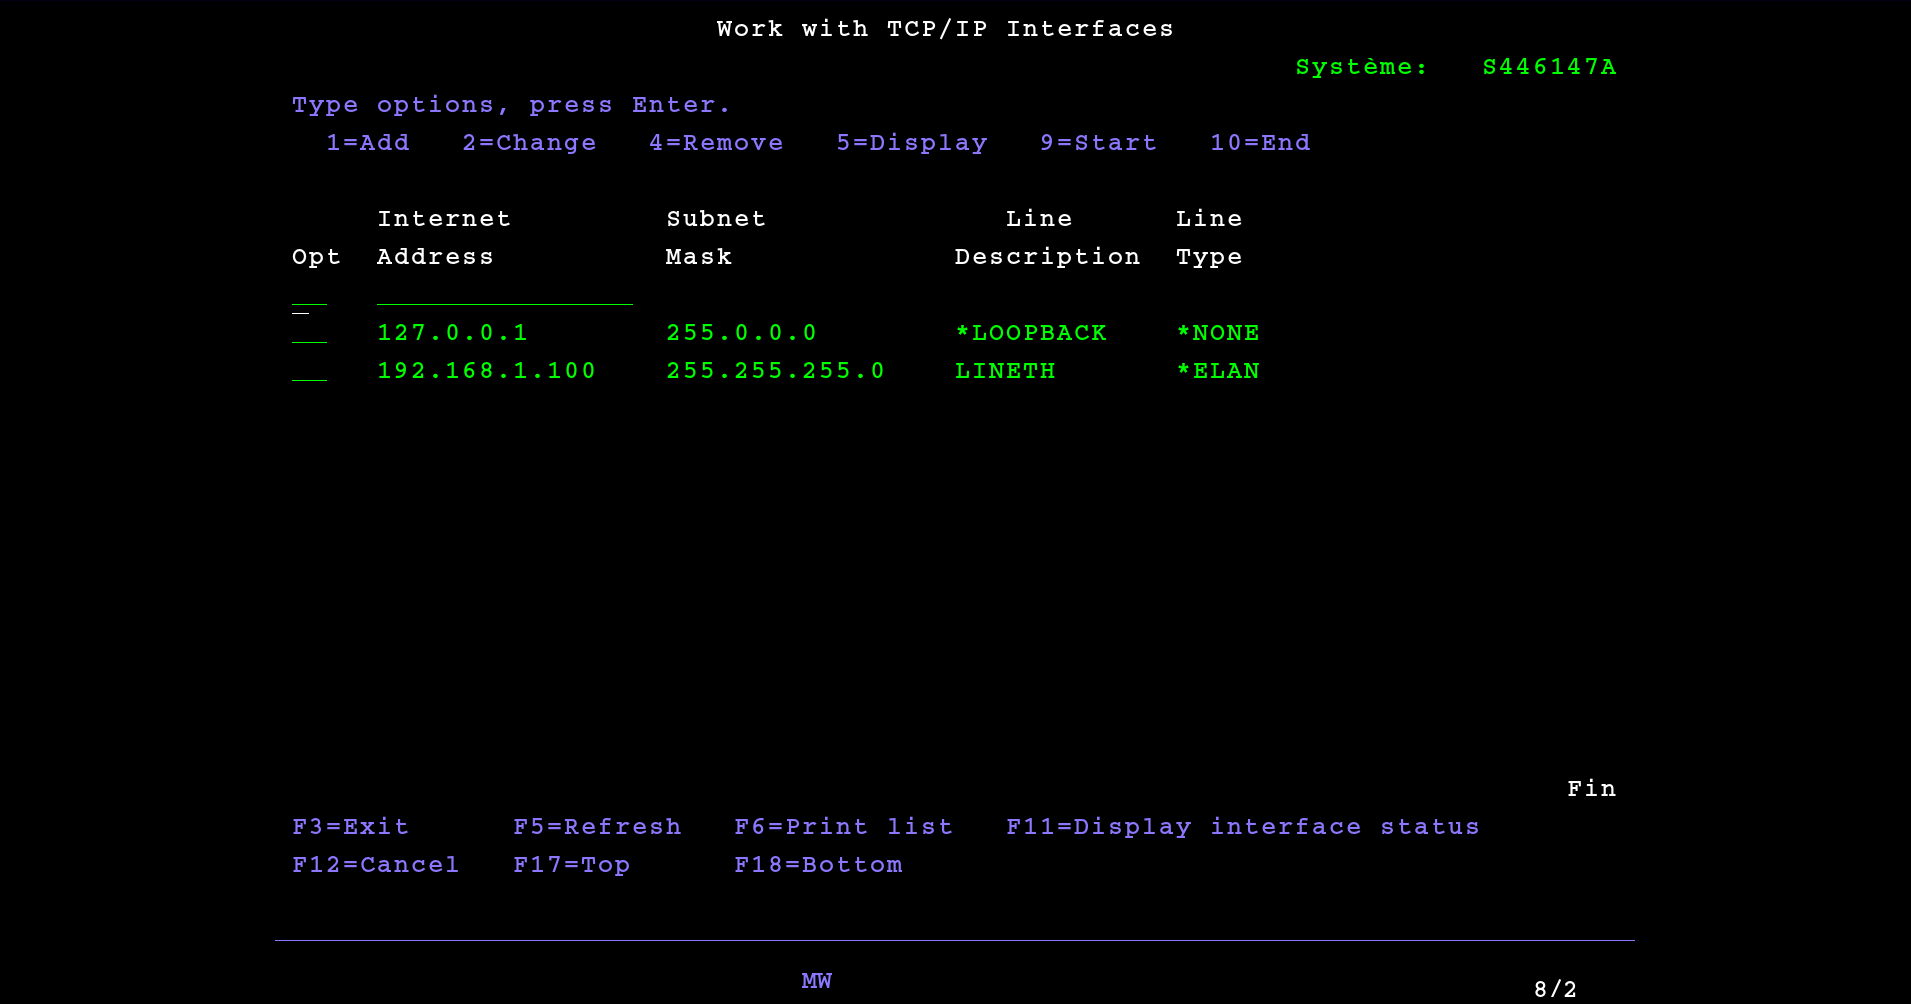
To activate the interfaces, go back to the TCP/IP interface configuration menu, by typing 1 from the Communications menu. Then you have to type 9 in all the Opt field of all the interfaces that we want to activate:
Références
- https://www.ibm.com/docs/en/i/7.4?topic=ssw_ibm_i_74/cl/strtcp.htm
- https://www.ibm.com/docs/en/i/7.4?topic=ssw_ibm_i_74/cl/cfgtcp.htm
- https://www.ibm.com/docs/en/i/7.4?topic=ssw_ibm_i_74/cl/chgtcpifc.htm
- https://www.ibm.com/docs/en/i/7.4?topic=ssw_ibm_i_74/cl/addtcpifc.htm
- https://docs.tibco.com/pub/mftps-ibmi/8.0.0/doc/html/GUID-85E44D97-7F29-485D-AE1A-B7800179ADBC.html